Official Kaggle Docker Image

|
Marko Gašparič Oct 14, 2021 - 4 min read |
Today, we will look at how to set up official Kaggle Docker images, with graphics card access. We will deploy a Docker container, based on the latest gcr.io/kaggle-gpu-images/python Docker image, which already contains everything we need. Remember, you do not need to install anything on your local machine.
Kaggle notebooks allow users to run Python notebooks against Kaggle competitions. They can be used for other purposes as well, however, they are pretty heavy. Thus, if you want to set up a simple JupyterLab environment, consider deploying another image described in this tutorial. Also, if you do not have a virtual machine with a graphics card attached to it, you can save some time and space by deploying gcr.io/kaggle-images/python, which is the CPU-only Kaggle image. For all others, who want to run Kaggle images on Tensor Sharing GPUs - the reminder of this tutorial is just for you.
Hardware Selection
It makes sense to select a region with a high reliability rating and more powerful instances. Kaggle image will take some time to install, and we do not want to lose our work and/or downloaded datasets, due to accessibility issues.
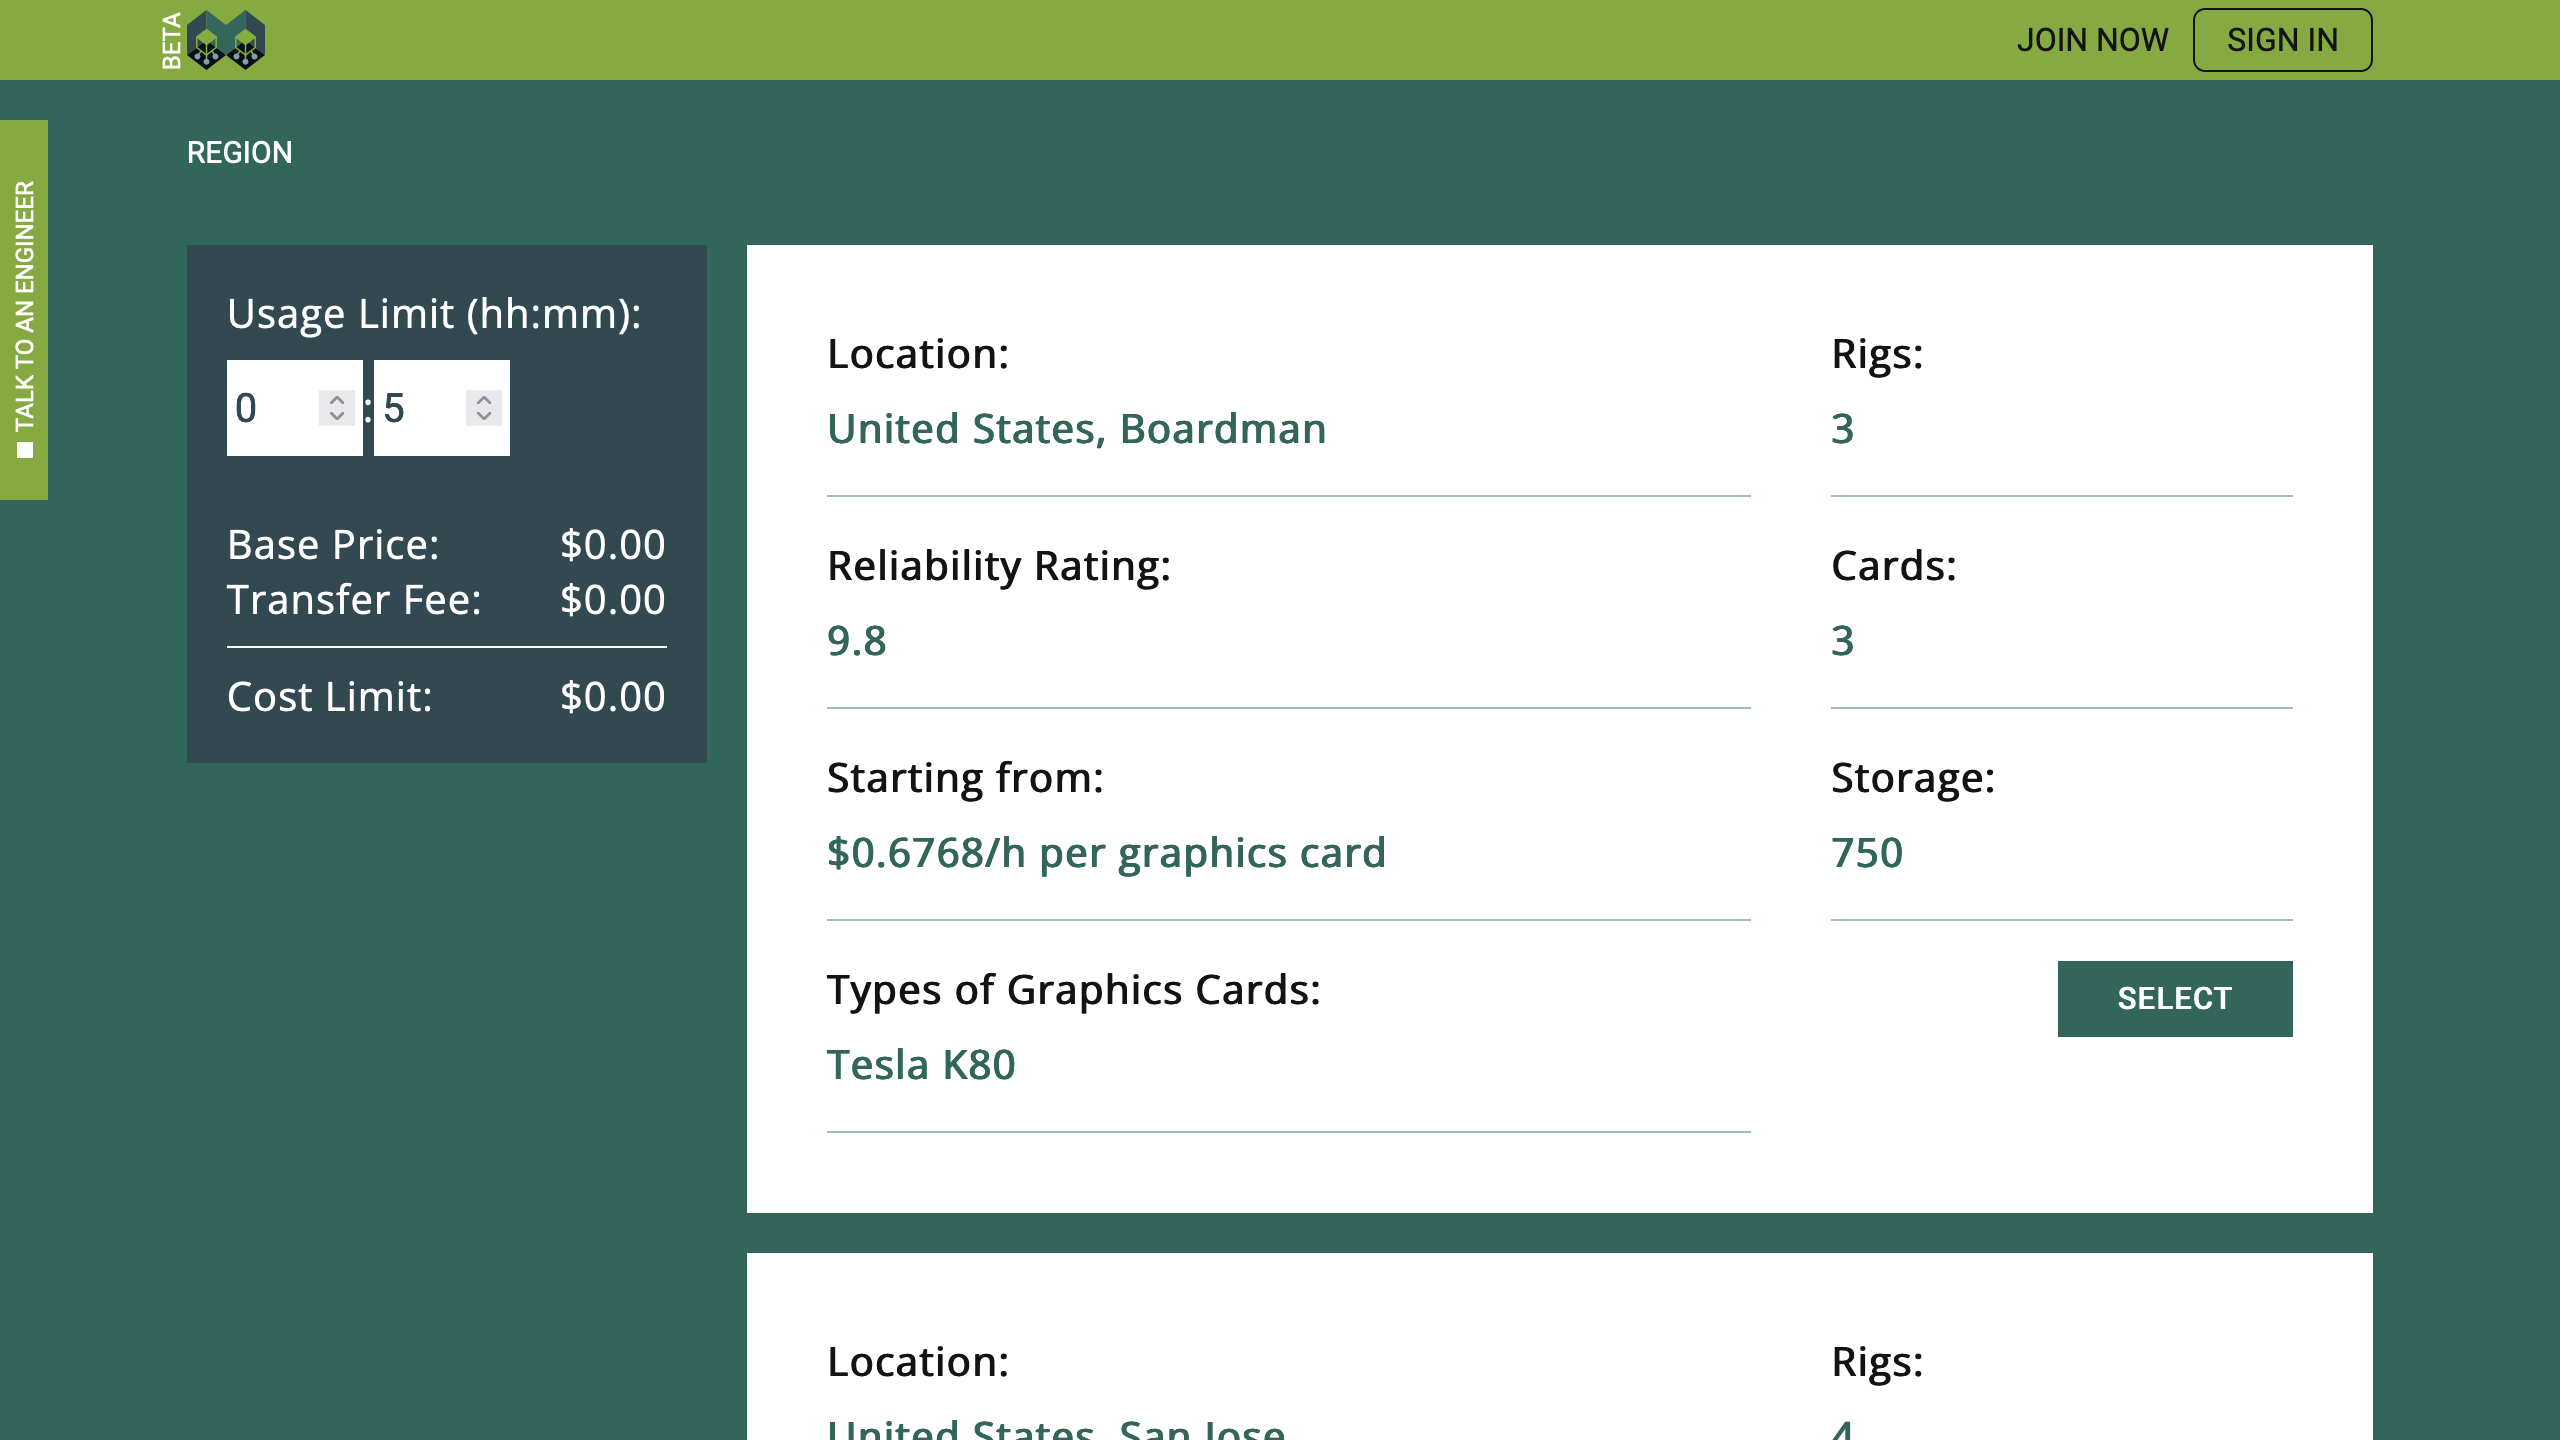
There is only one type of rig in this region. And one is enough, for the purposes of this tutorial. Let us reserve this hardware for two days (see "48" in the "Usage Limit"). Furthermore, under the "Number of Instances" label, select "1". Set the "Number of Cores" to "4", "Memory" to "59 GB", and "Storage" to "200 GB". If you want to pick a different region and/or a different rig, do not forget to select at least one graphics card there too.

Obviously, when you gain more experience, you can customize your hardware requirements according to your needs, which may be different from those assumed in this tutorial.
Environment Selection
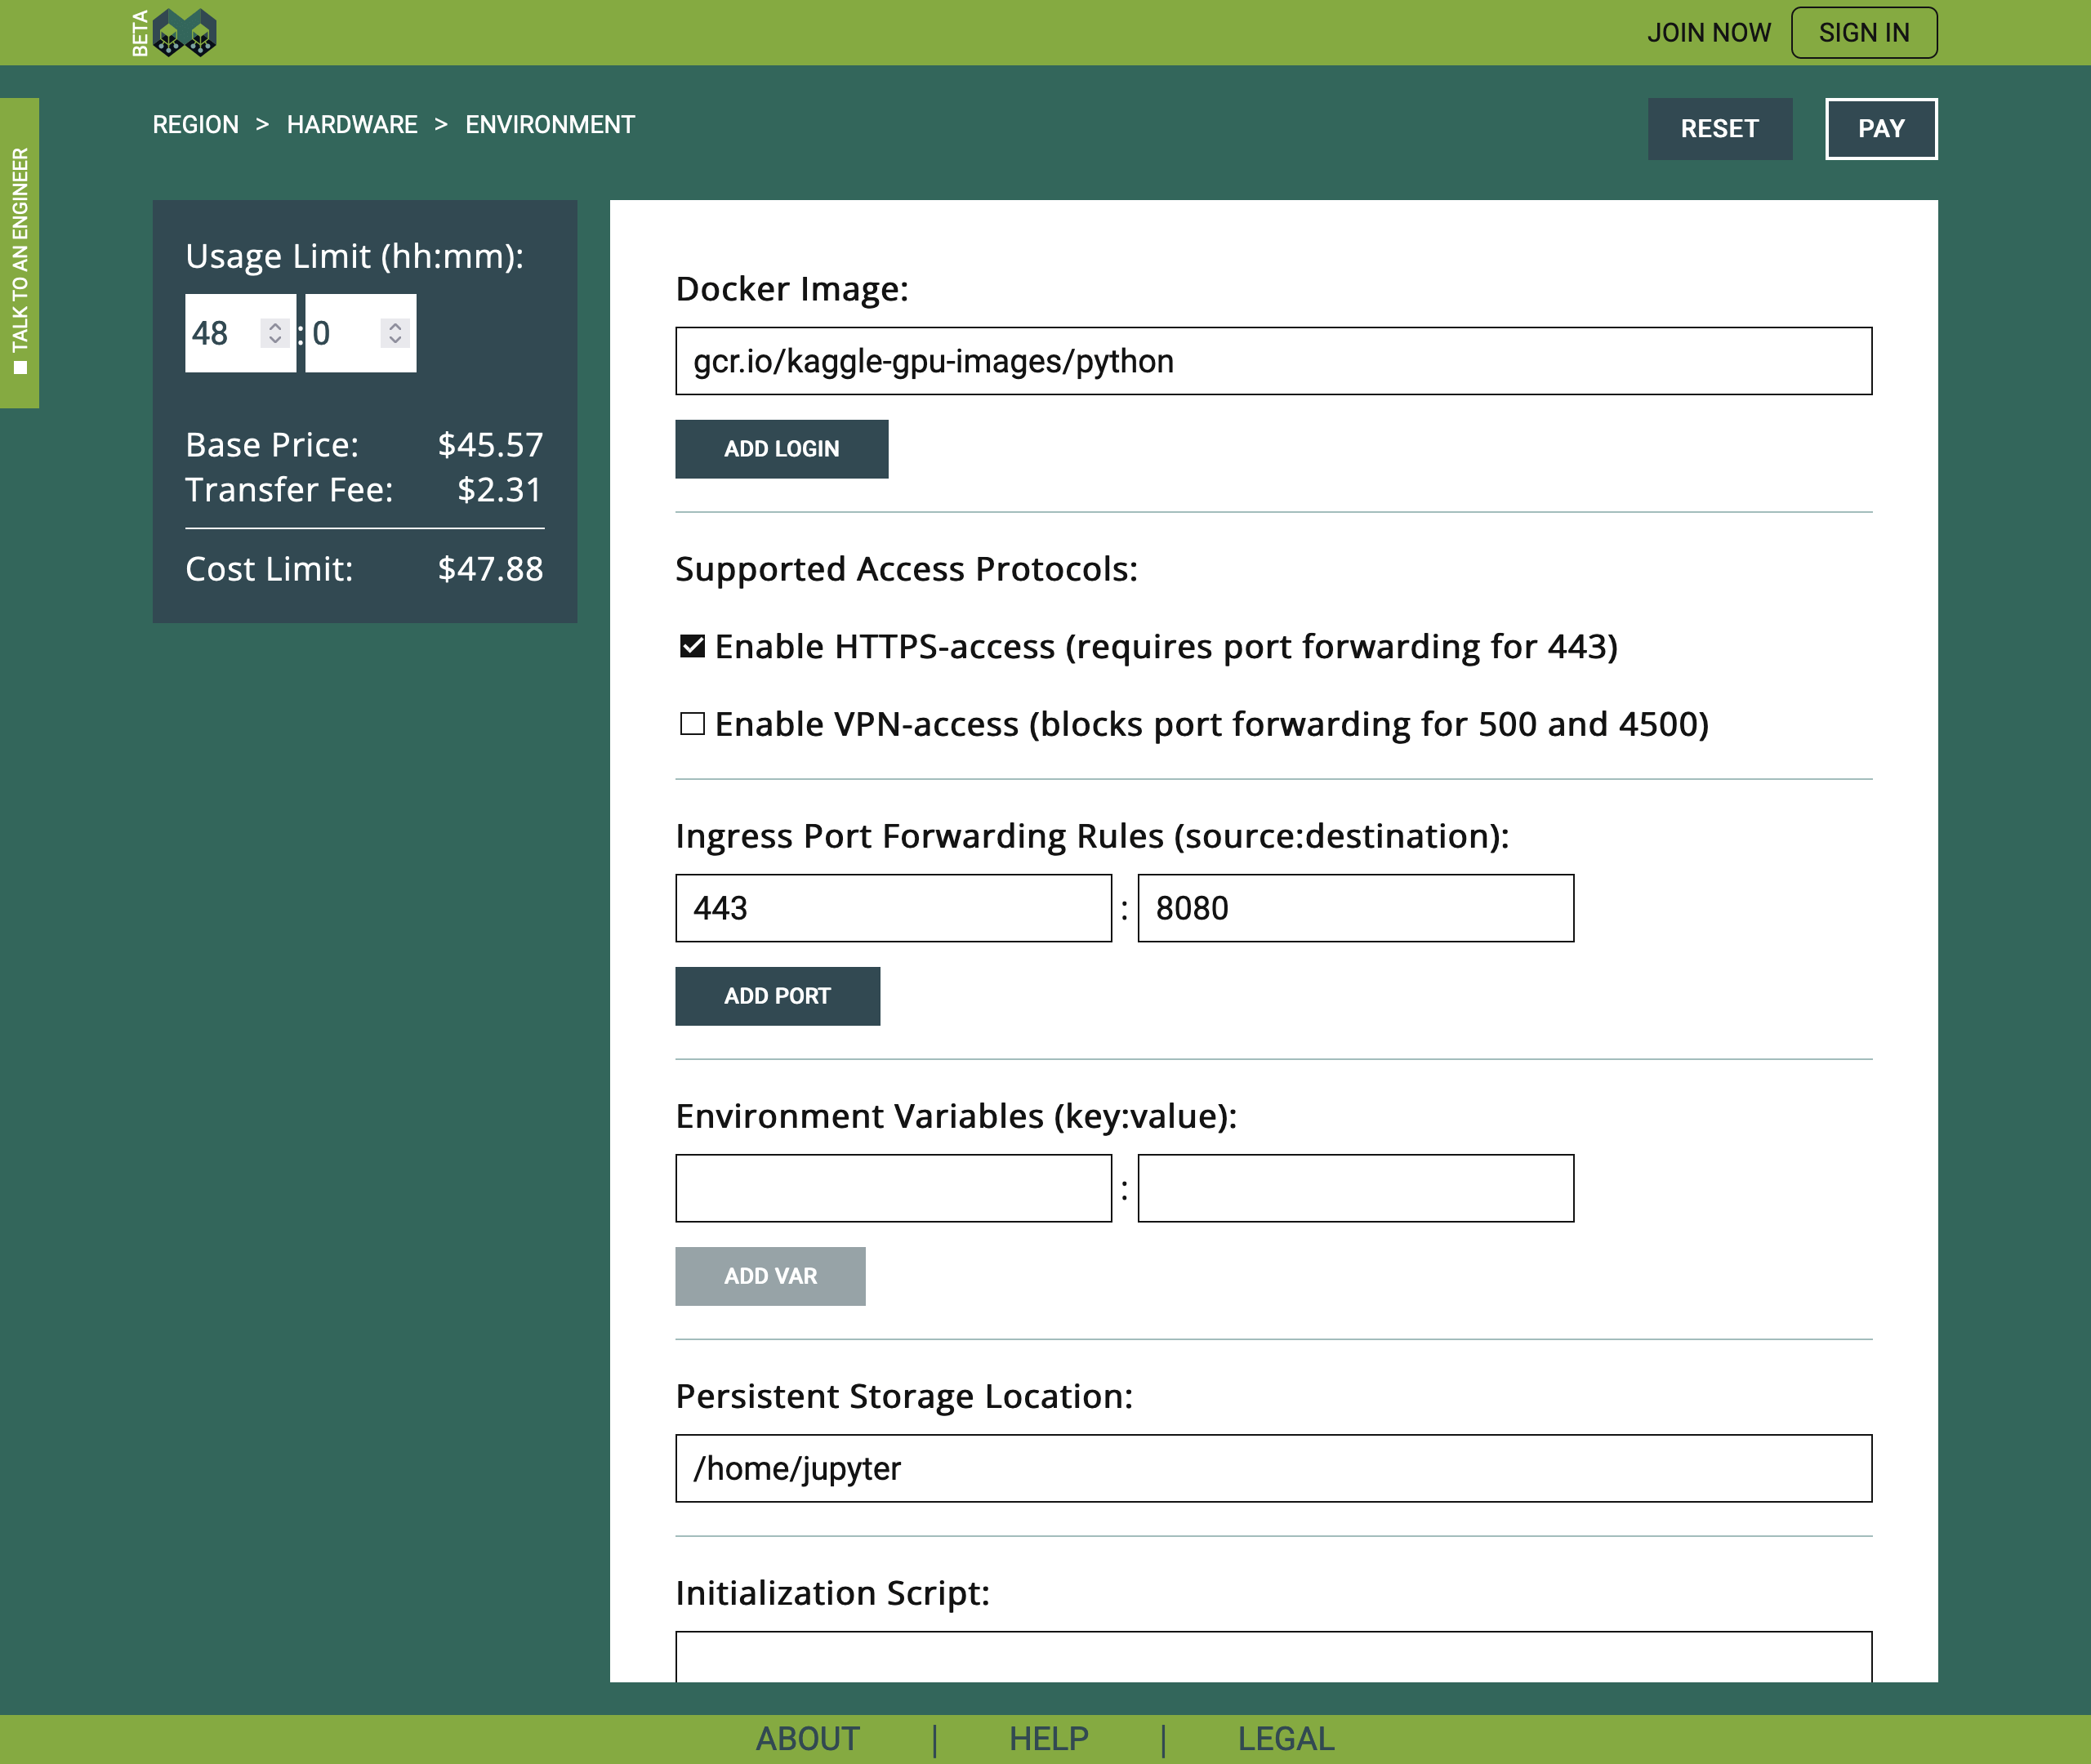
Great! We can now define the environment we would like to install on the virtual machine. As already mentioned, today, we are working with "gcr.io/kaggle-gpu-images/python". Furthermore, as Kaggle notebooks will open in your local browser, while running on a remote machine, we need to enable HTTPS-access. See the checkmark under "Supported Access Protocols". Additionally, we need to map "Https Ingress Port" "443" to "8080", which is the default port used by gcr.io/kaggle-gpu-images/python. Finally, we are going to define a custom path for the "Persistent Storage Location", using "/home/jupyter" directory. The setup should be as follows:
And that is all, actually. It is very simple to set up Kaggle environment on Tensor Sharing. What do you think?
Payment
At the final step of the hiring process, on the left side, you are able to double-check the selected environment and hardware. If something is wrong, you should navigate back and correct the mistakes. Otherwise, you may enter your email address and click "Confirm", to activate the Terms of Service agreement checkmark.
When you express your agreement with the Terms of Service, PayPal buttons will appear, and you can decide between the direct PayPal payment or Credit Card payment via PayPal. Both options ensure that Tensor Sharing will not see any of your payment credentials. The platform will only receive the information on the payment status, which, in case of success, will finish the virtual machine hiring process.
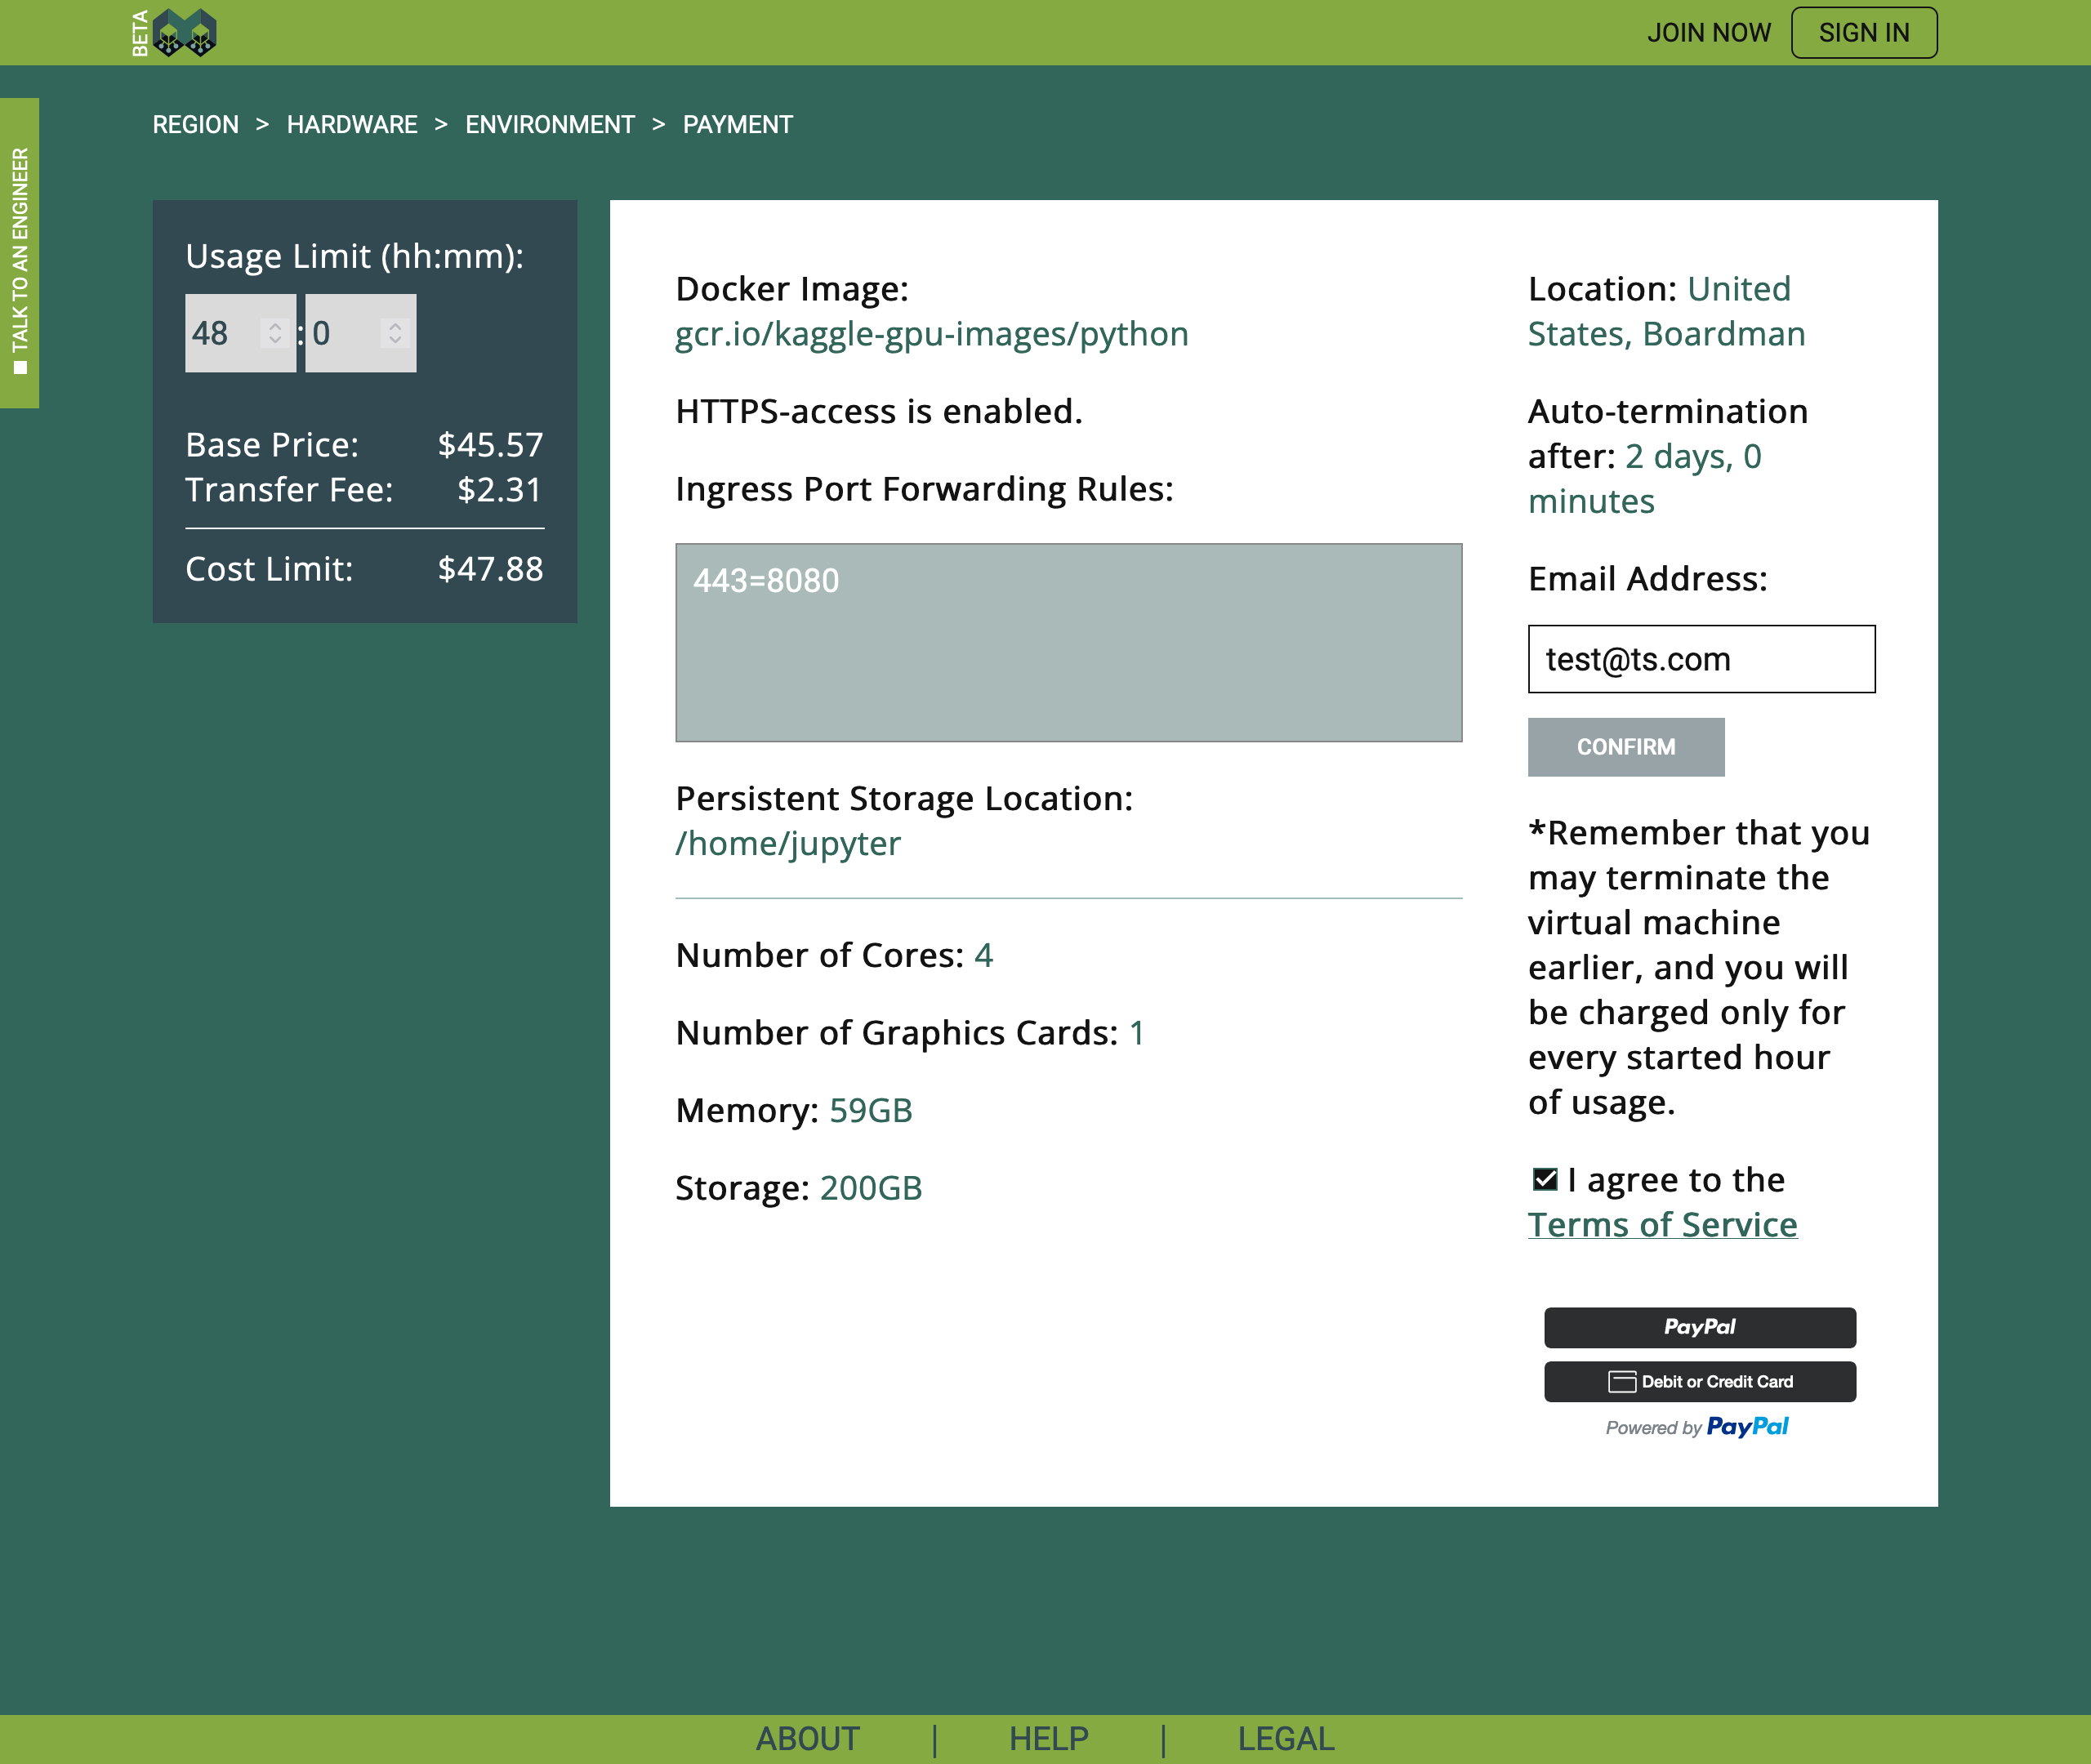
For example, if you click on the upper PayPal button, a pop-up window will appear, and you can use your PayPal account to execute the payment. The payment limit for the selected hardware and duration is $47.88, which means that $47.88 will be reserved, but you may be charged less if you terminate your session earlier.
If the payment is successful, you will see a corresponding message with two options. To navigate back to the Tensor Sharing main page, you should select the "Home" button, and to see the control board of the hired virtual machine, you should select the "Log" button.
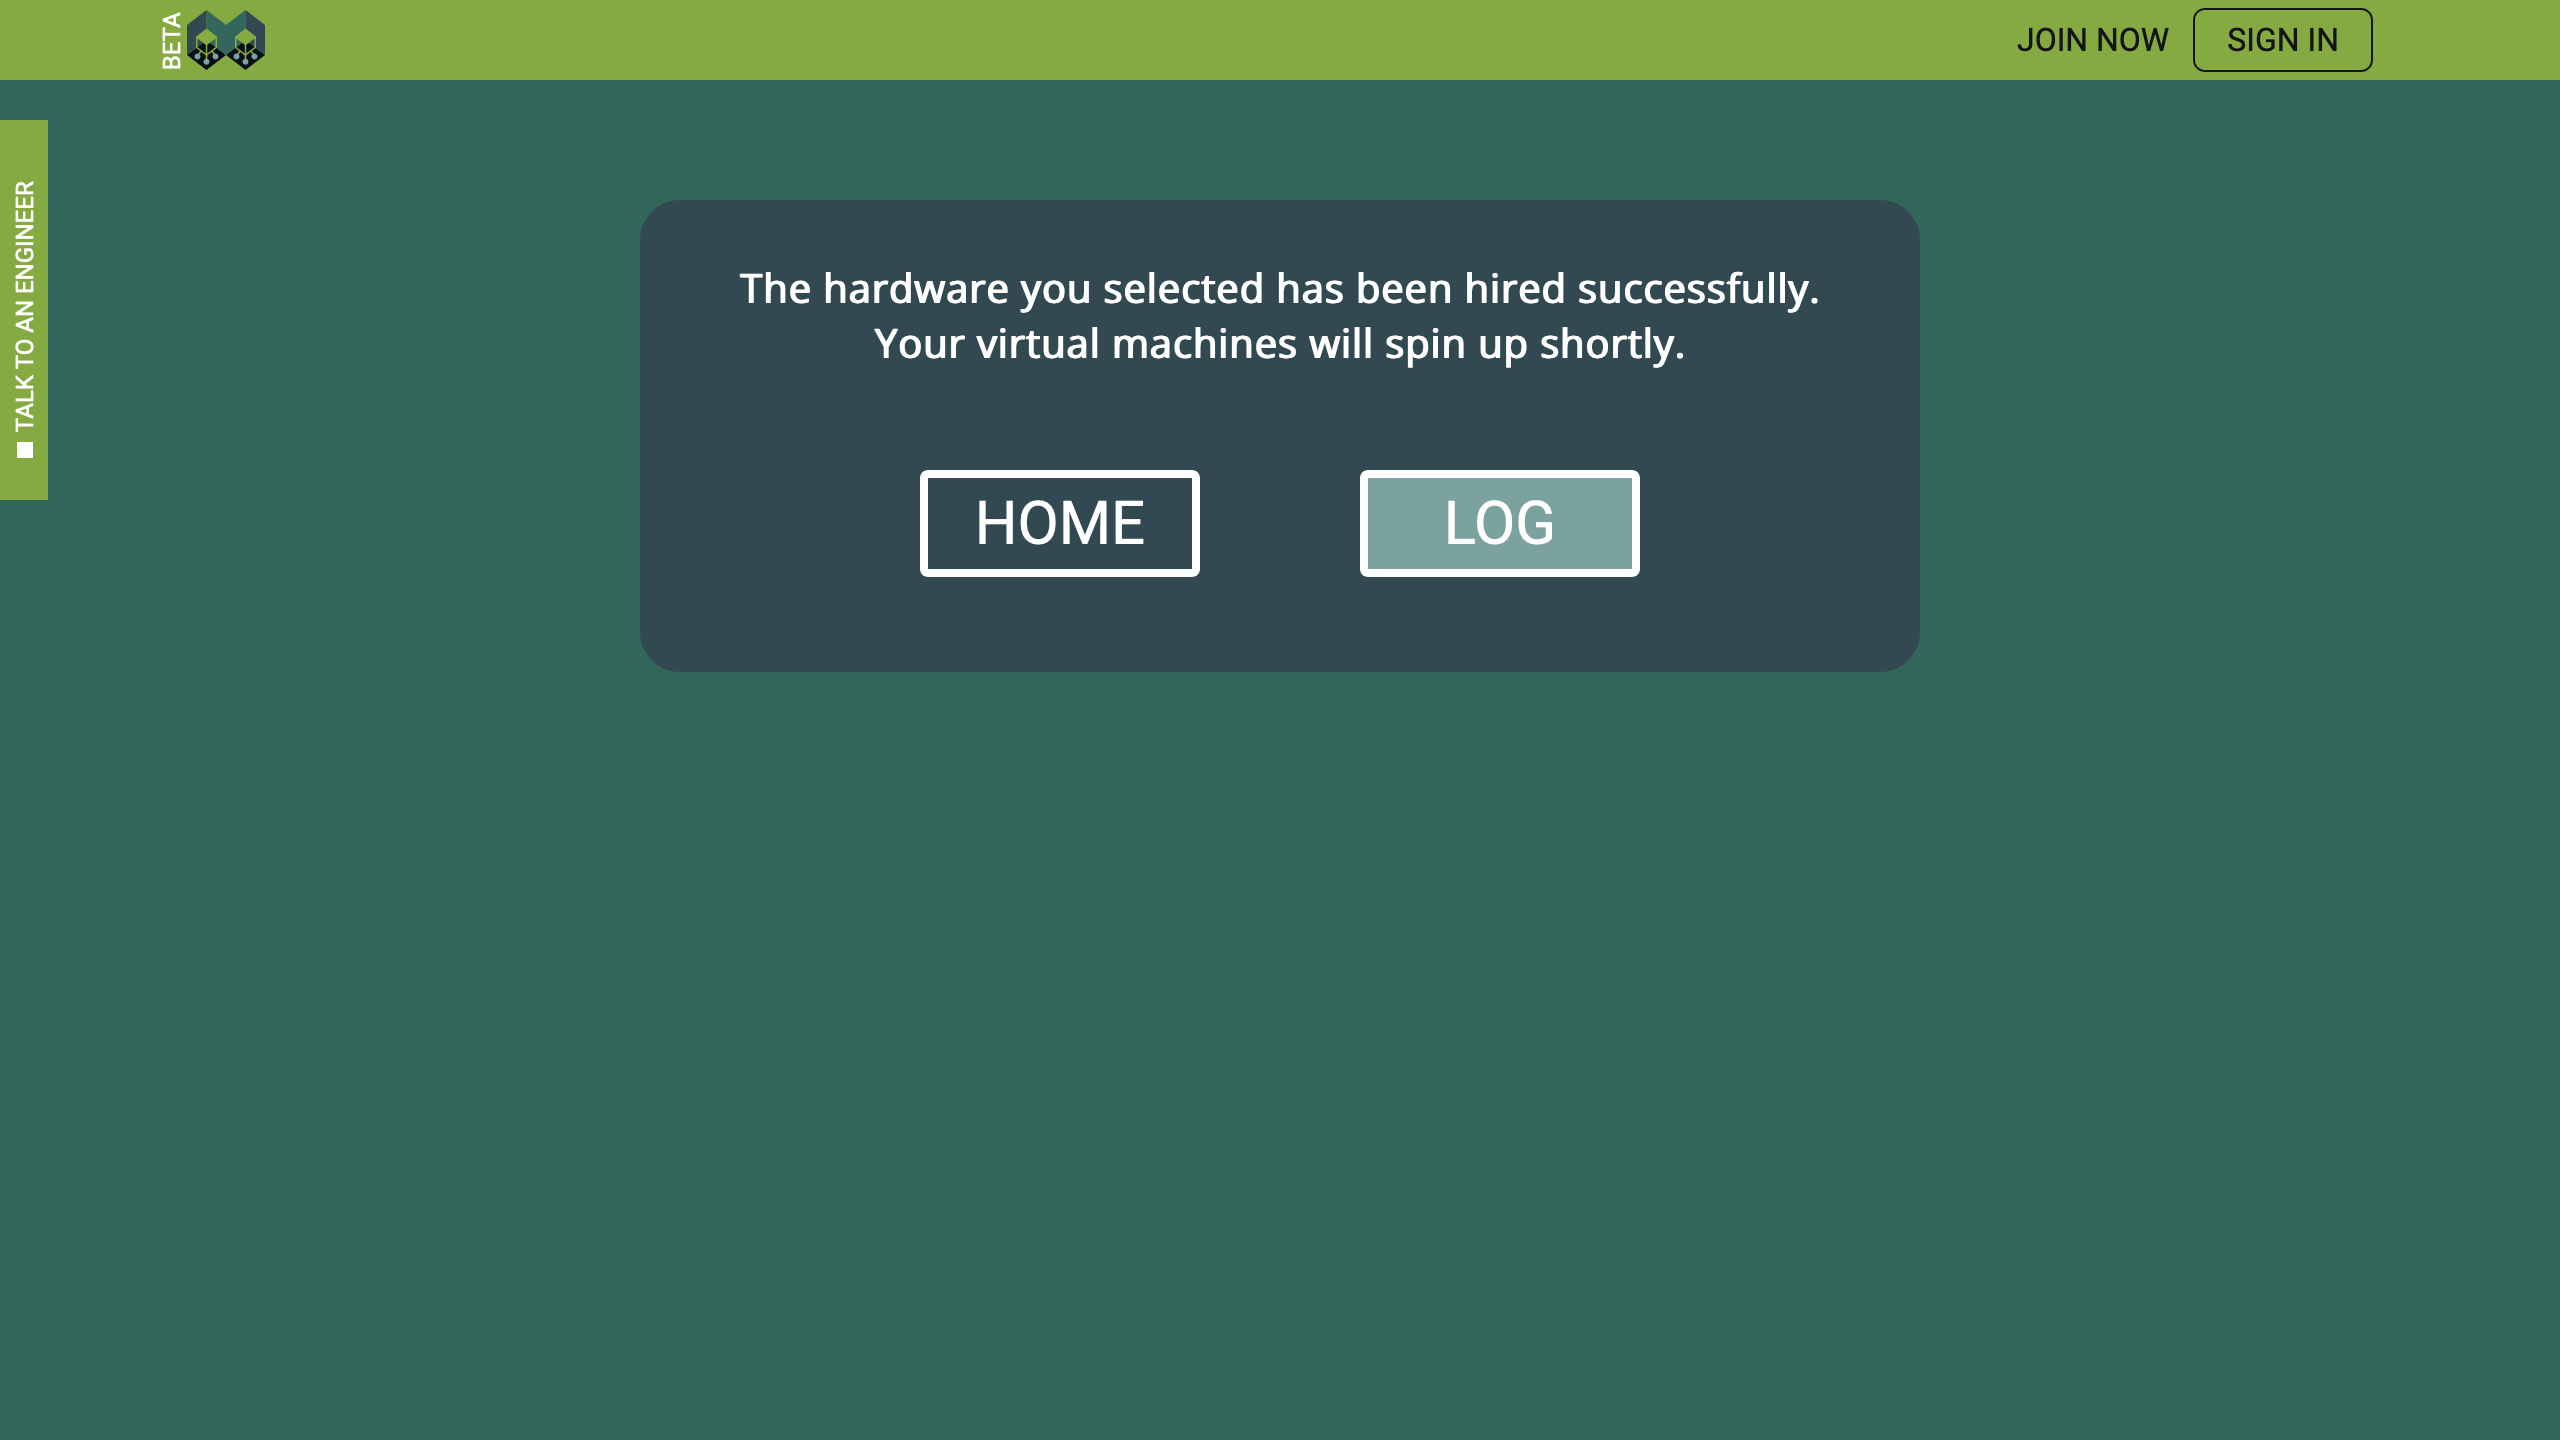
The equivalent to the Log content will be sent also to the email address you specified.
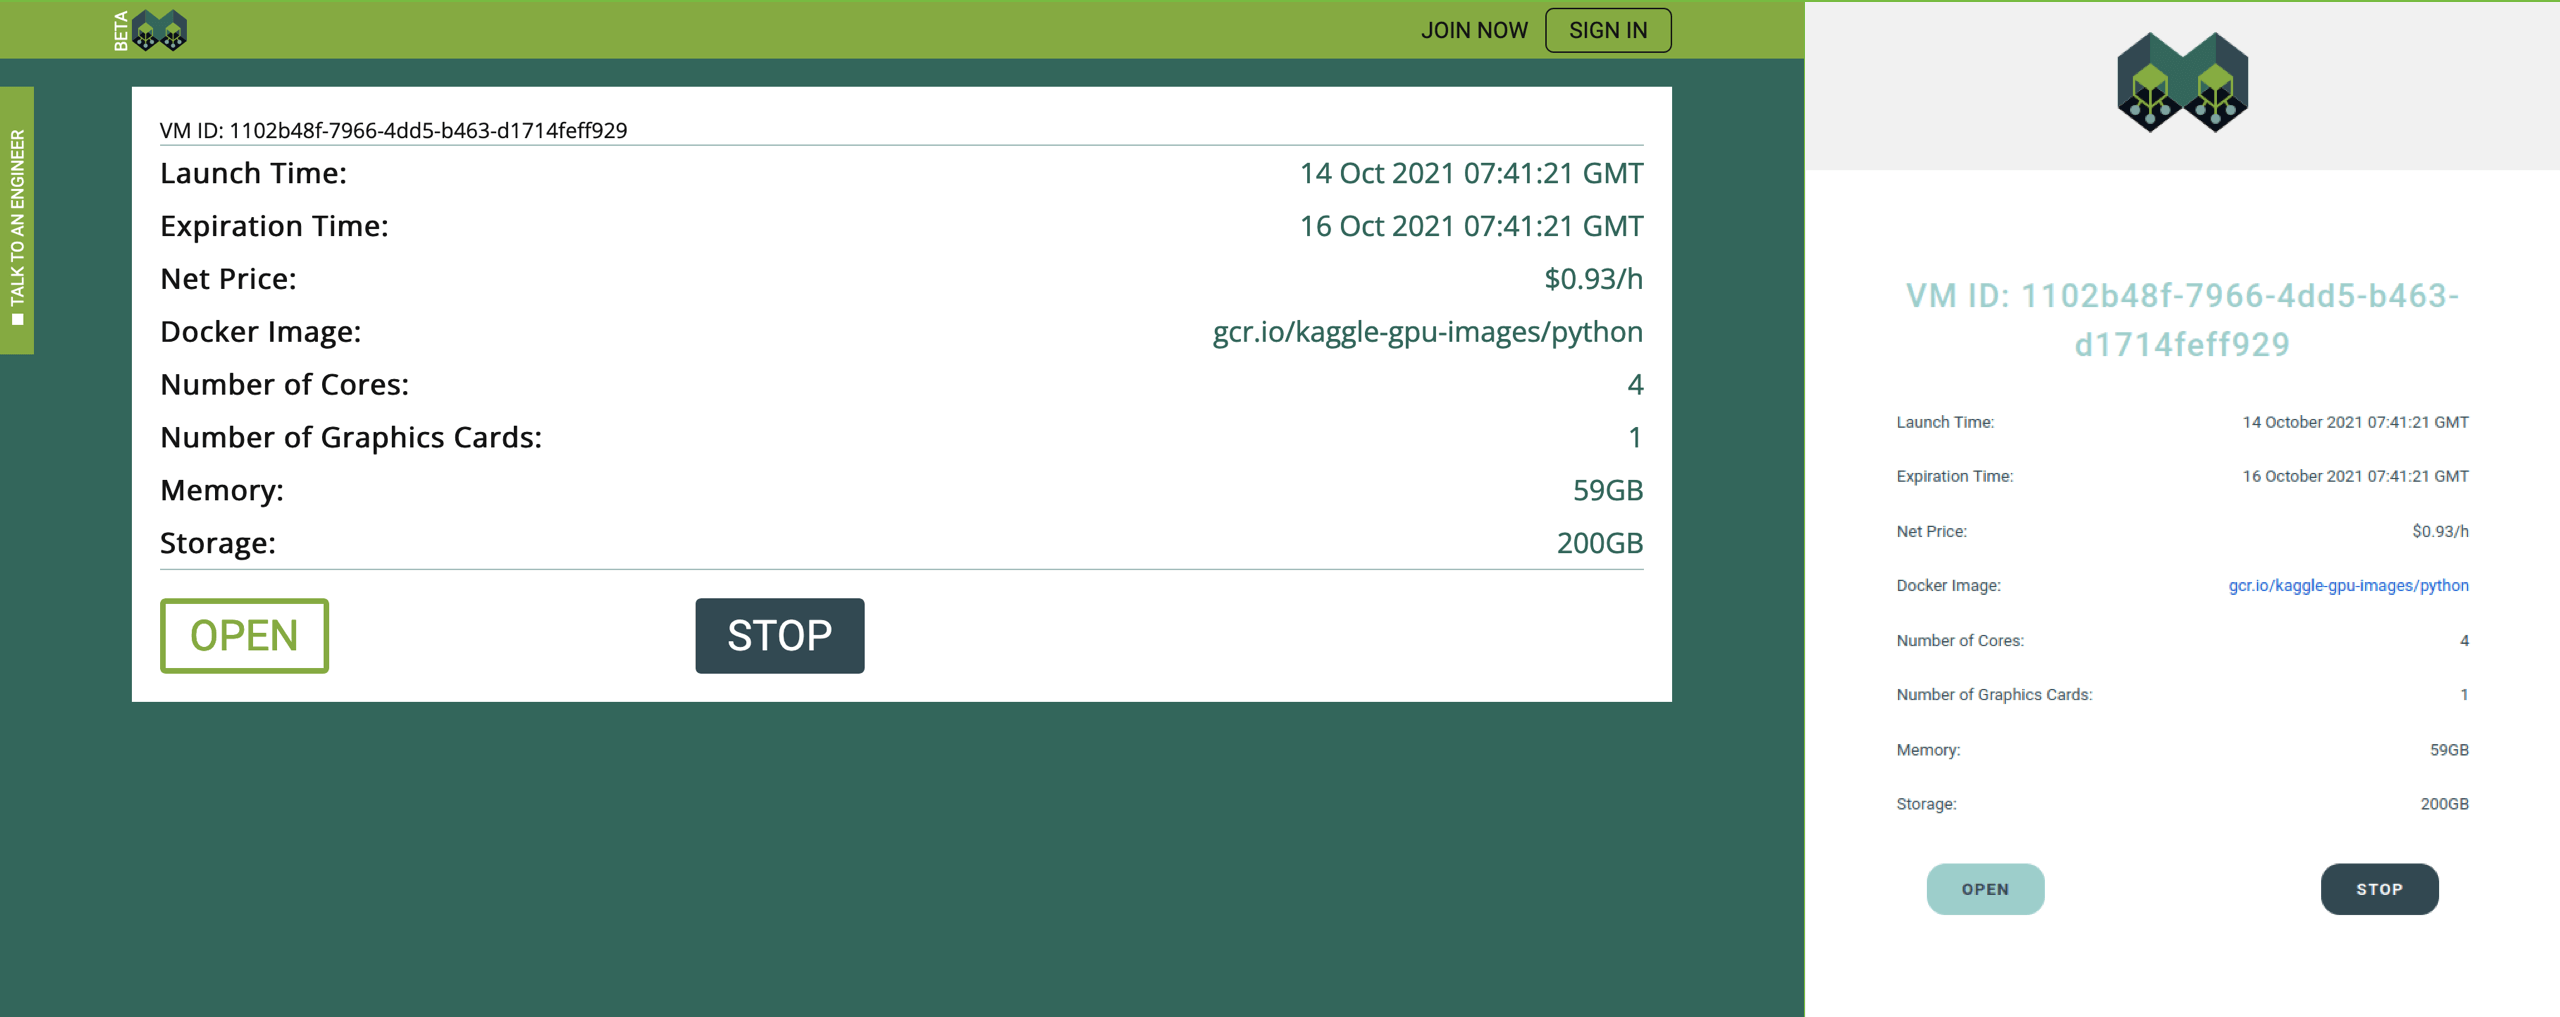
Take a note that if you deleted the email sent by "no-reply@tensorsharing.com", you closed the web-page or navigated away from the https://www.tensorsharing.com/hire, and you do not have the Tensor Sharing account, you can still recover your access to the virtual machine by creating a new Tensor Sharing account with the same email address that you used for the payment. If you already have the Tensor Sharing account, hired virtual machines will always be visible in your dashboard. However, if you cannot access the selected email address, and you cannot sign in to your Tensor Sharing account, you will not be able to control or access the virtual machine you just hired when https://www.tensorsharing.com/hire is closed.
Kaggle
It will take two or three minutes, on average, before the virtual machine spins up and some content appears when you click on the "Open" button. For security reasons, the URL of the virtual machine, has the following format: "https://[ID].vm.sharedtensors.com/?TS-Authorization=[TOKEN]". Do not share this link or the TS-Authorization token with anyone! It gives you secure access to your virtual machine.
It may take some time before your Docker image is downloaded and deployed. You can track the progress on the virtual machine web-page.

Once the Docker container is up and running, you will see the dashboard.
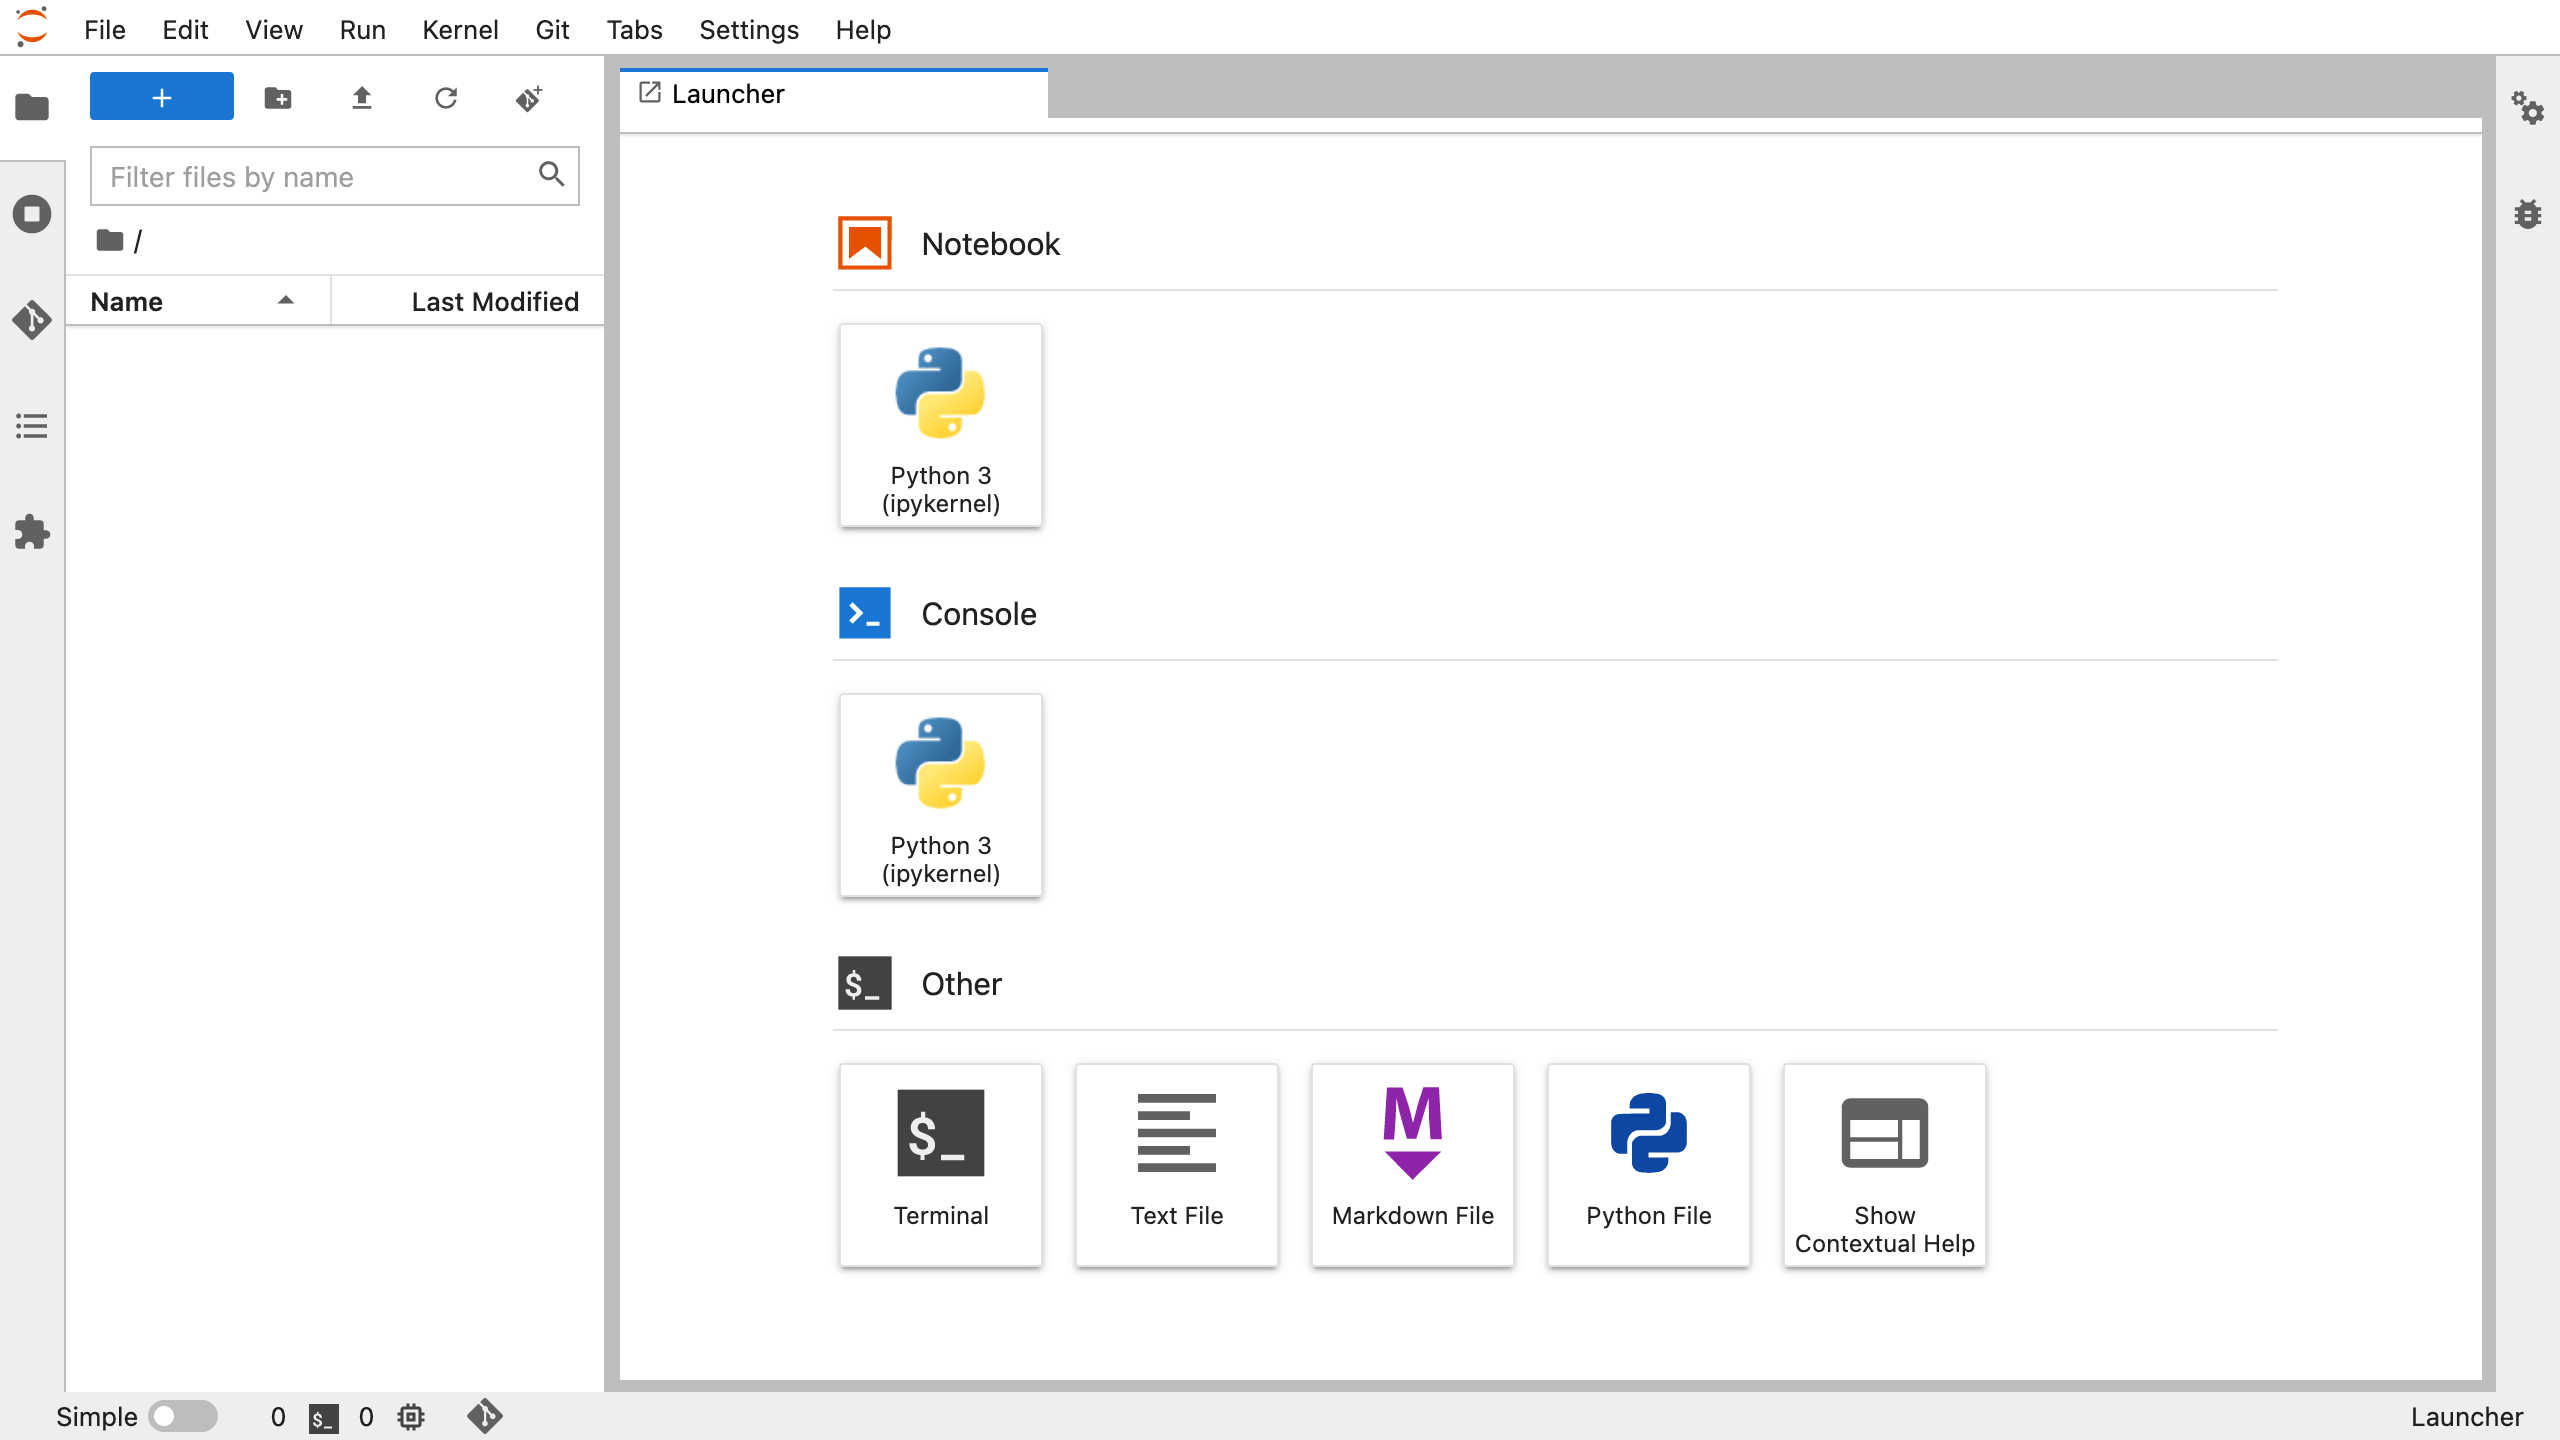
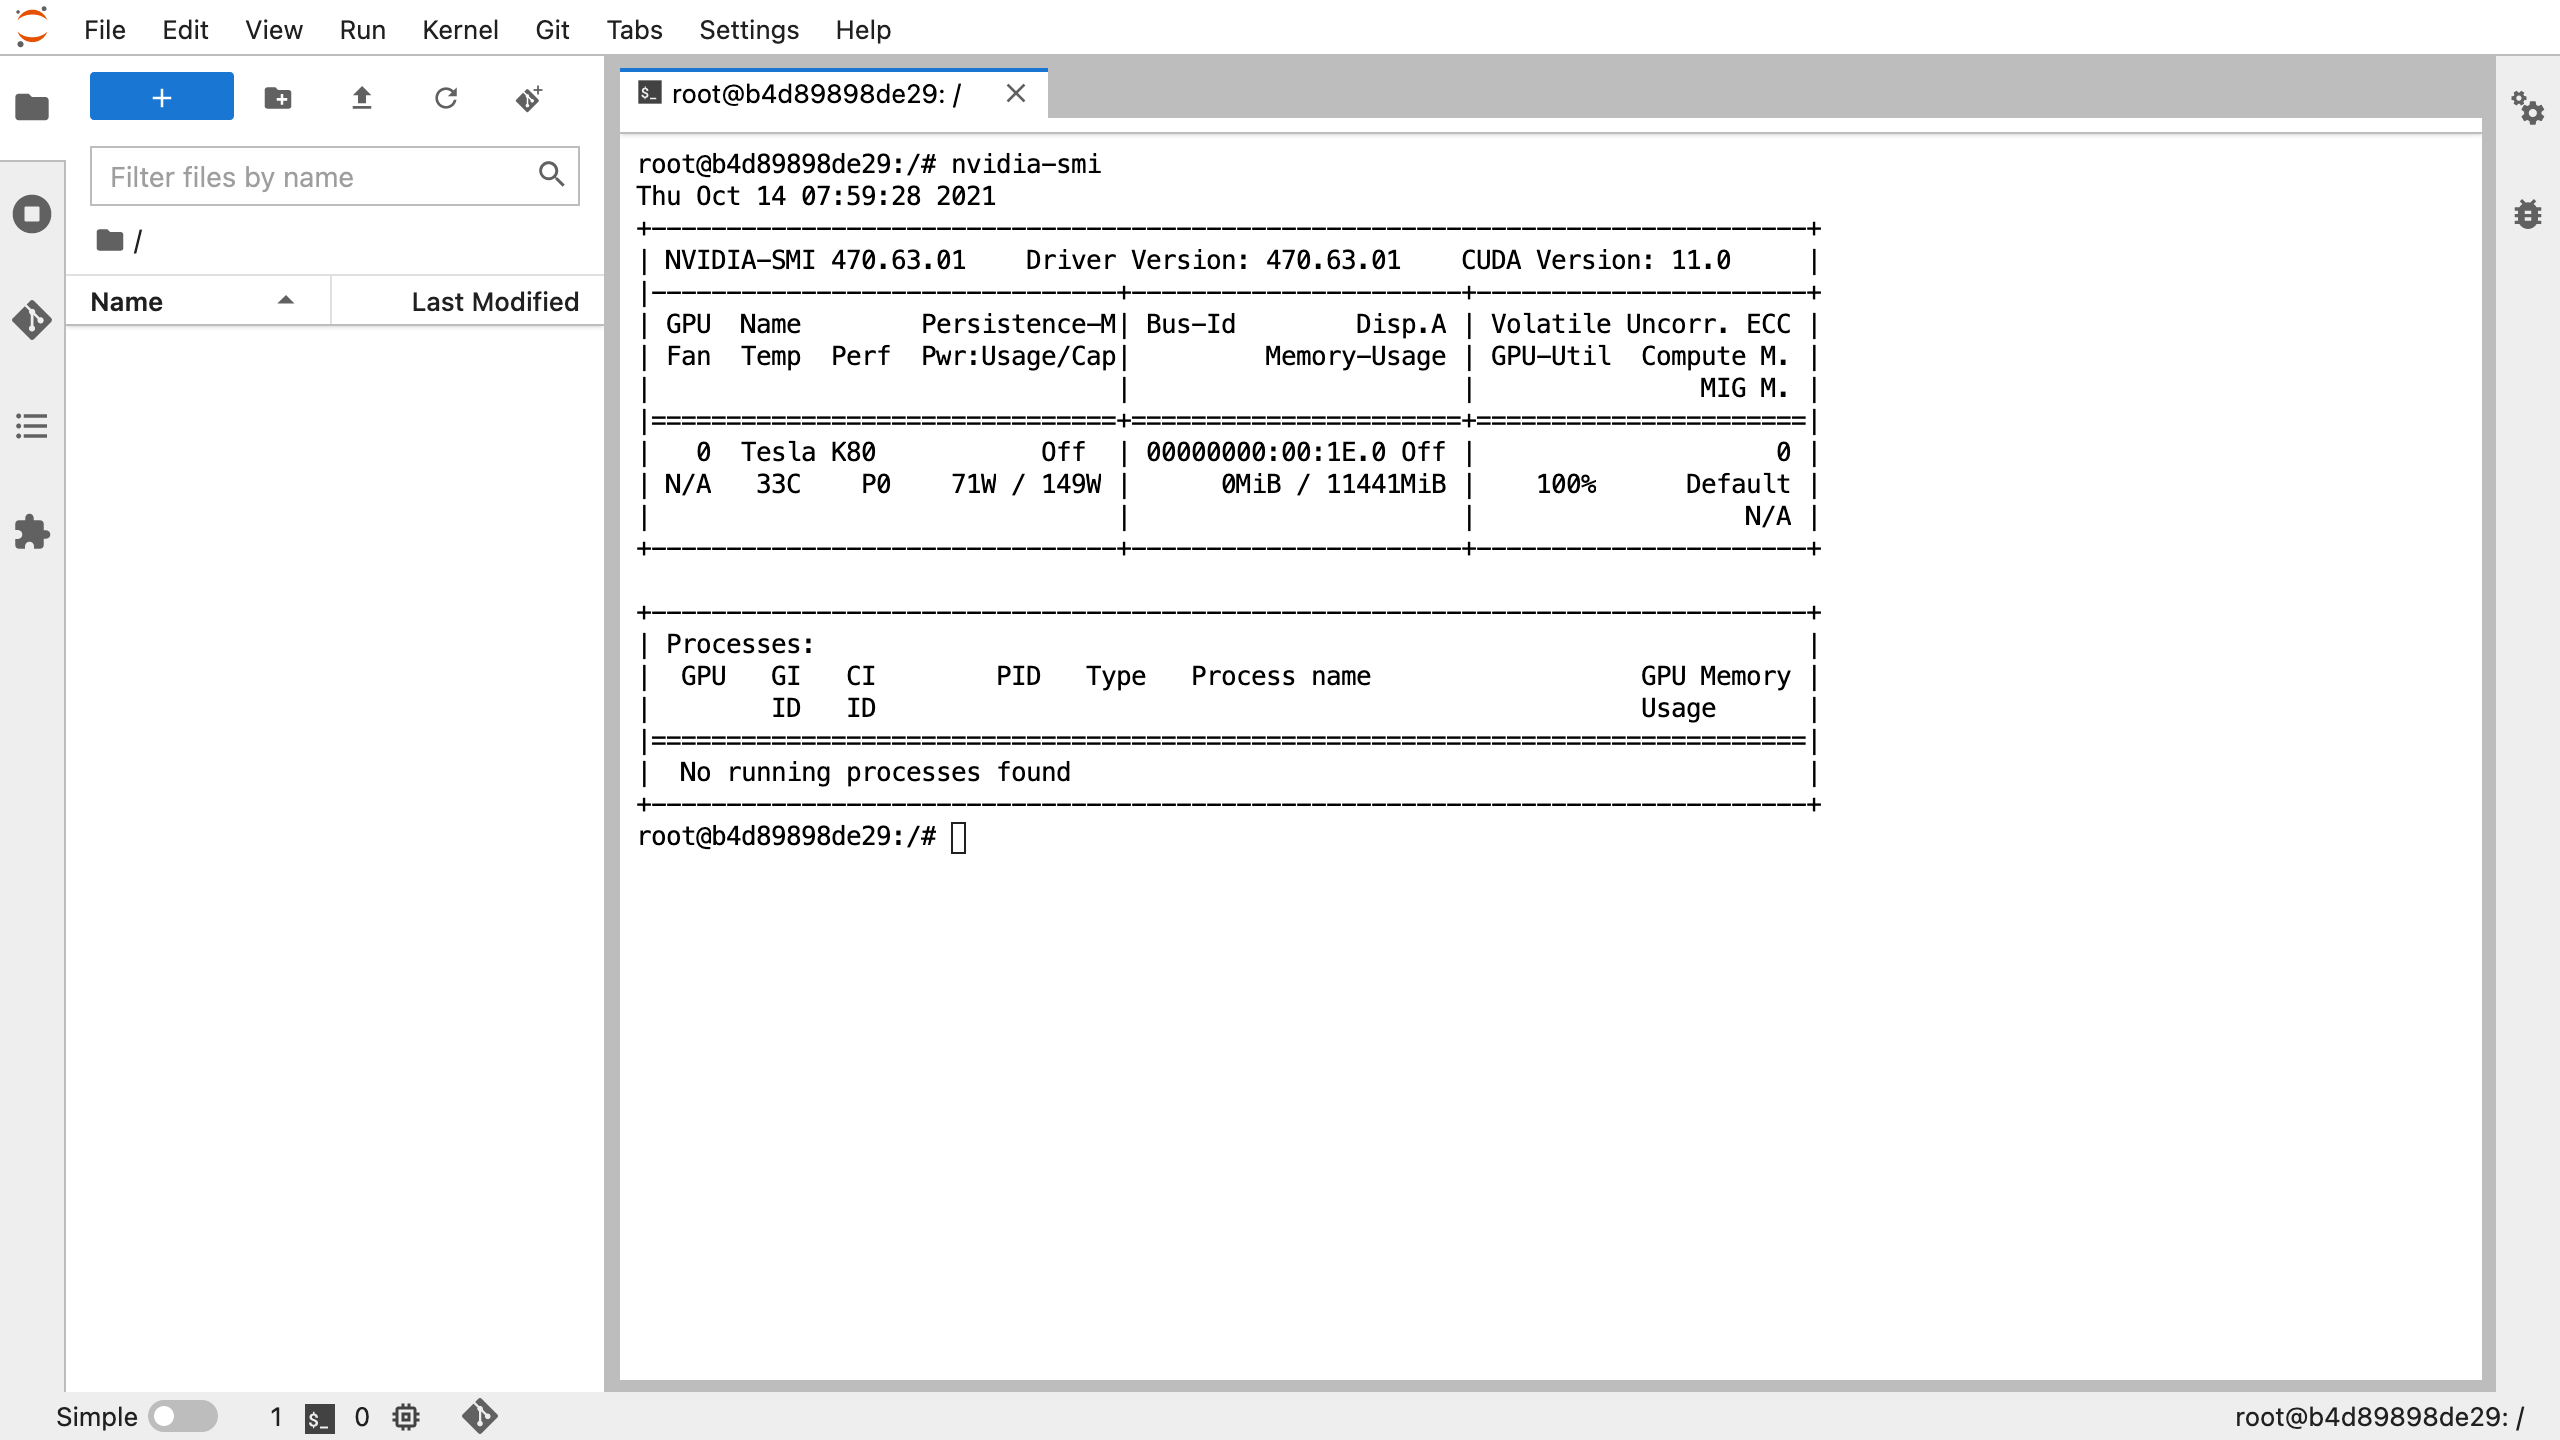
You can work in a terminal, as shown in the following example:
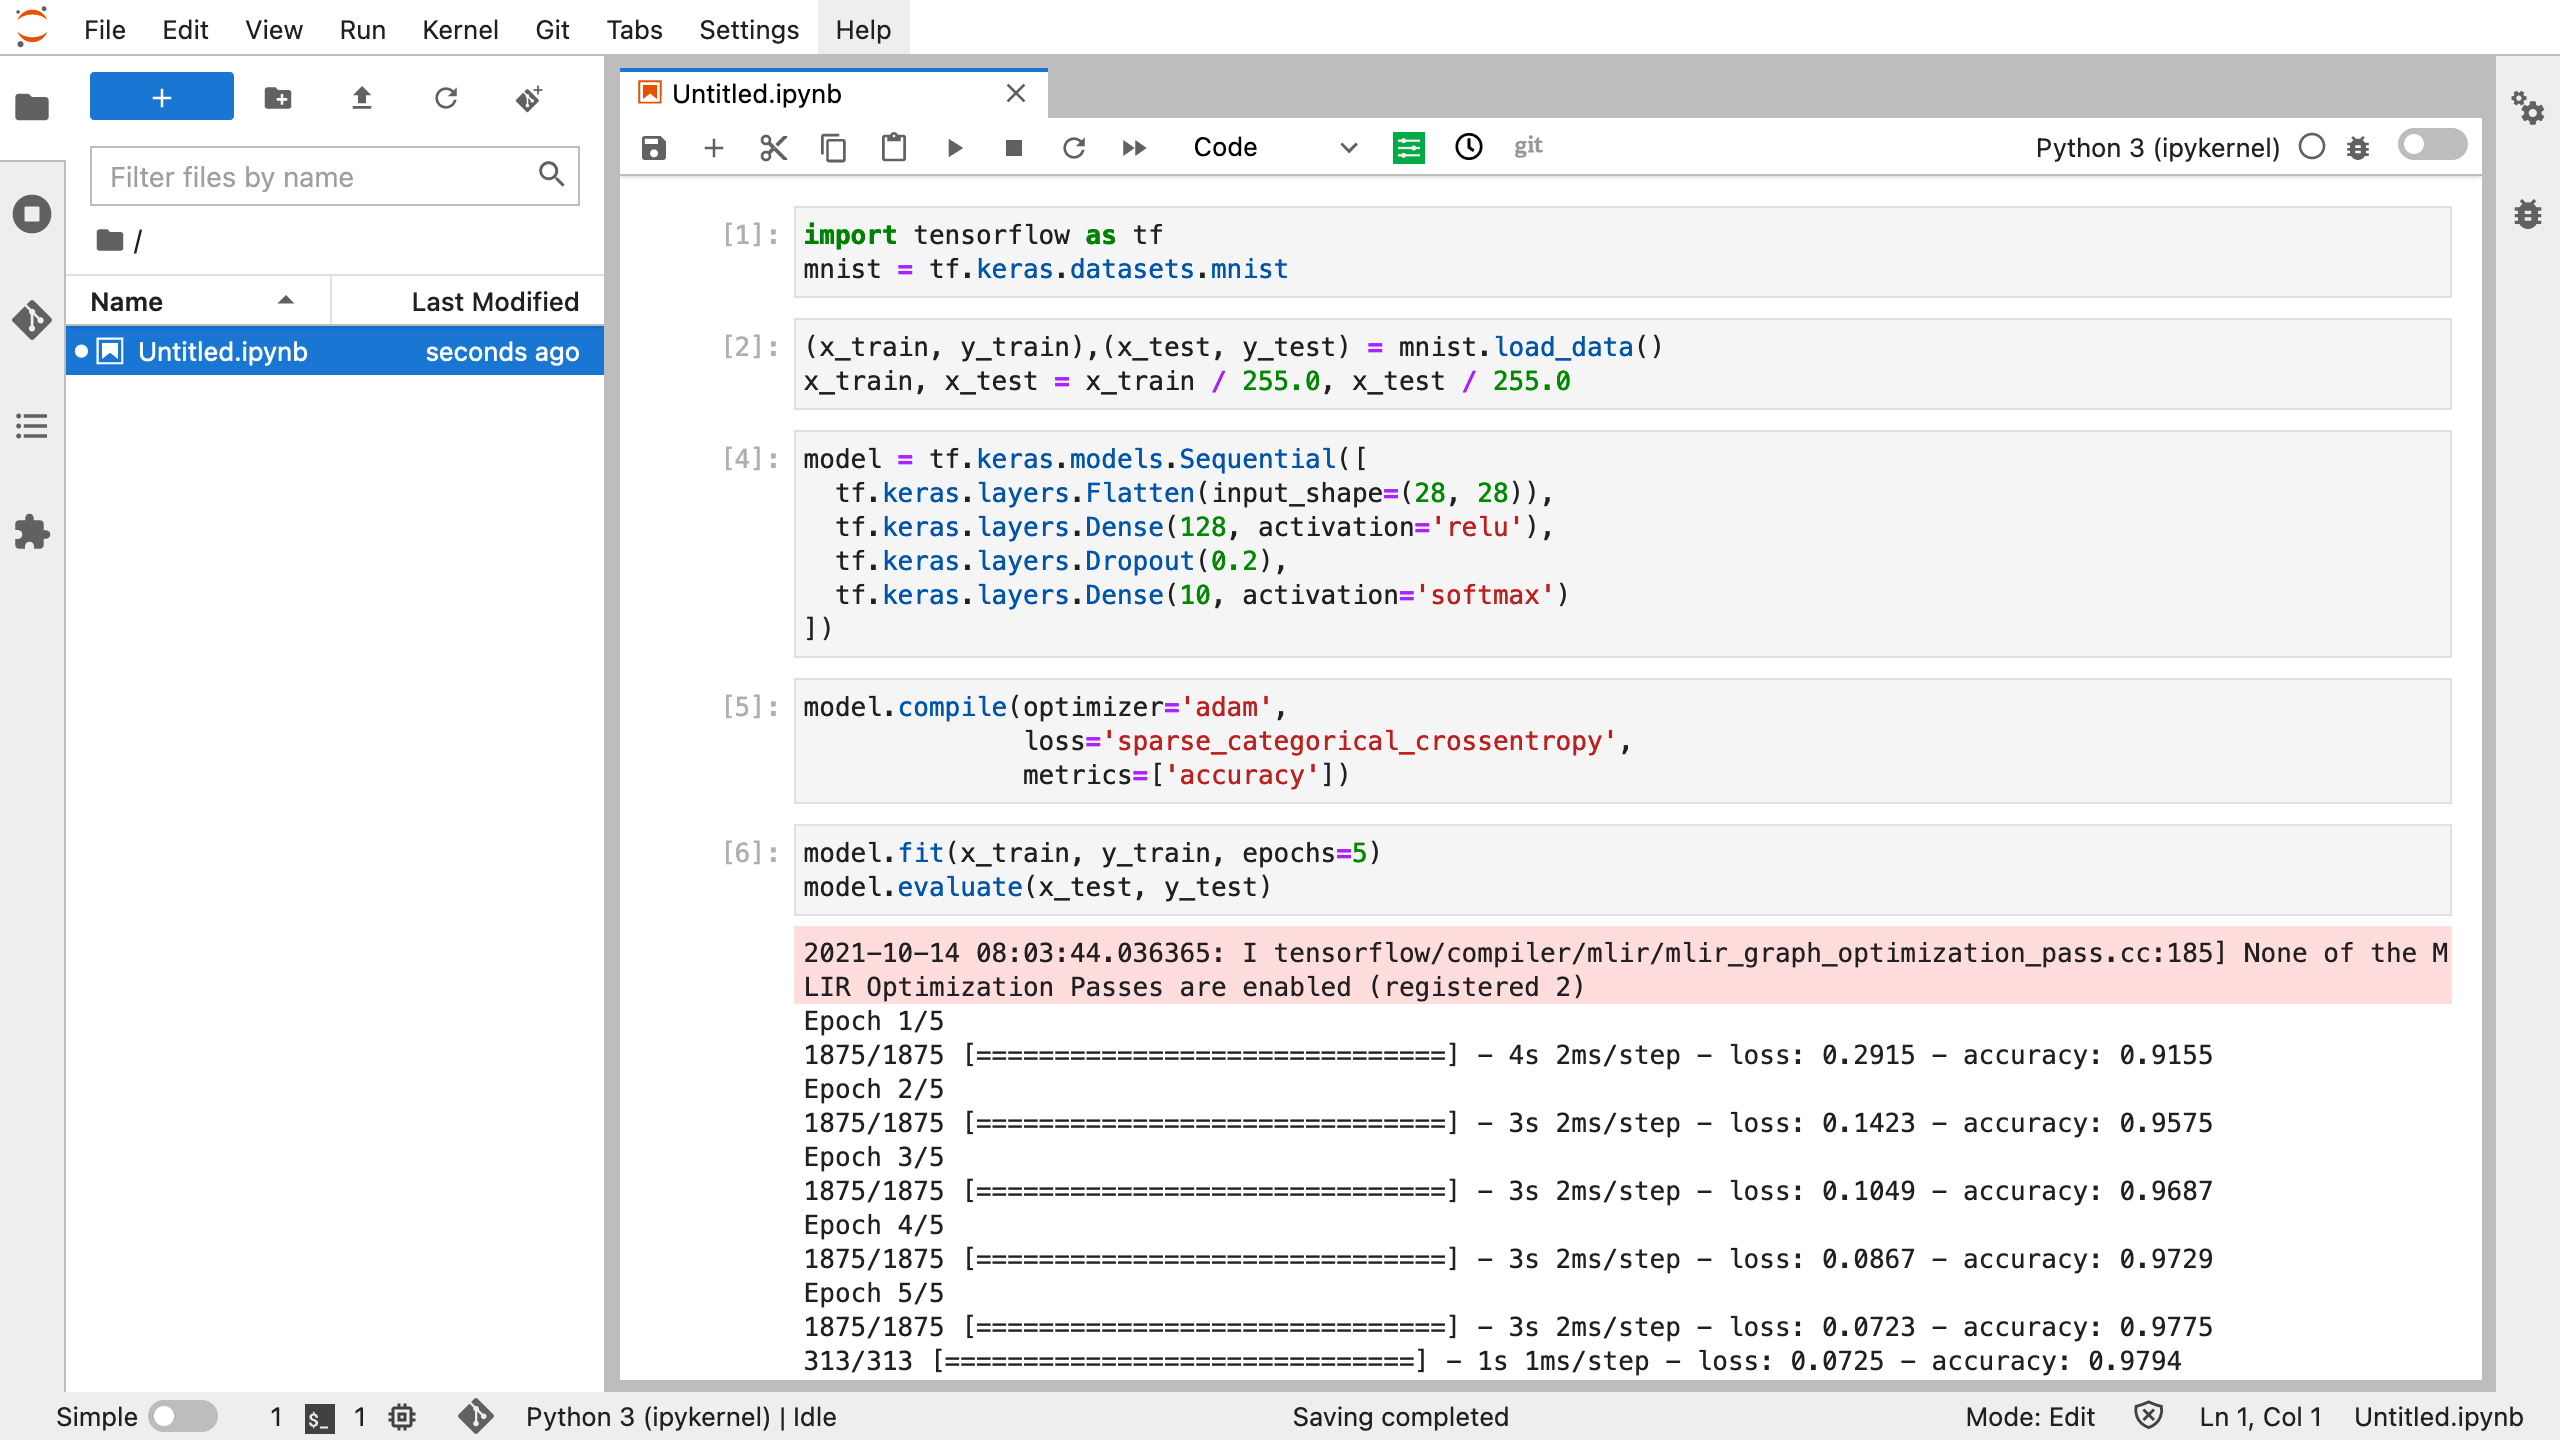
You can also write and run scripts in a typical notebook environment. It is up to you.
Have fun using Tensor Sharing and have a productive day!