Linux OpenSSH Server

|
Marko Gašparič Oct 14, 2021 - 4 min read |
Today, we will look at how to set up an OpenSSH Server, using hardware available on the Tensor Sharing marketplace. Let us pretend that we need to cache some files in the eastern part of the European Union. For that purpose, we can use linuxserver/openssh-server Docker image.
On your local machine, you will need a VPN client. Mac and Windows provide one as a part of the OS installation, but your favorite software should work with Tensor Sharing as well. If you do not have a VPN client, you will have to install one. Nothing else needs to be installed on your local machine.
Hardware Selection
We are going to spin up our virtual machine in Budapest, Hungary. It seems that this is a new region, which does not have a reliability rating yet, but that is not a problem because cached files can always be fetched from other locations, even if it fails. The "Usage Limit" of 36 hours seems appropriate as well.
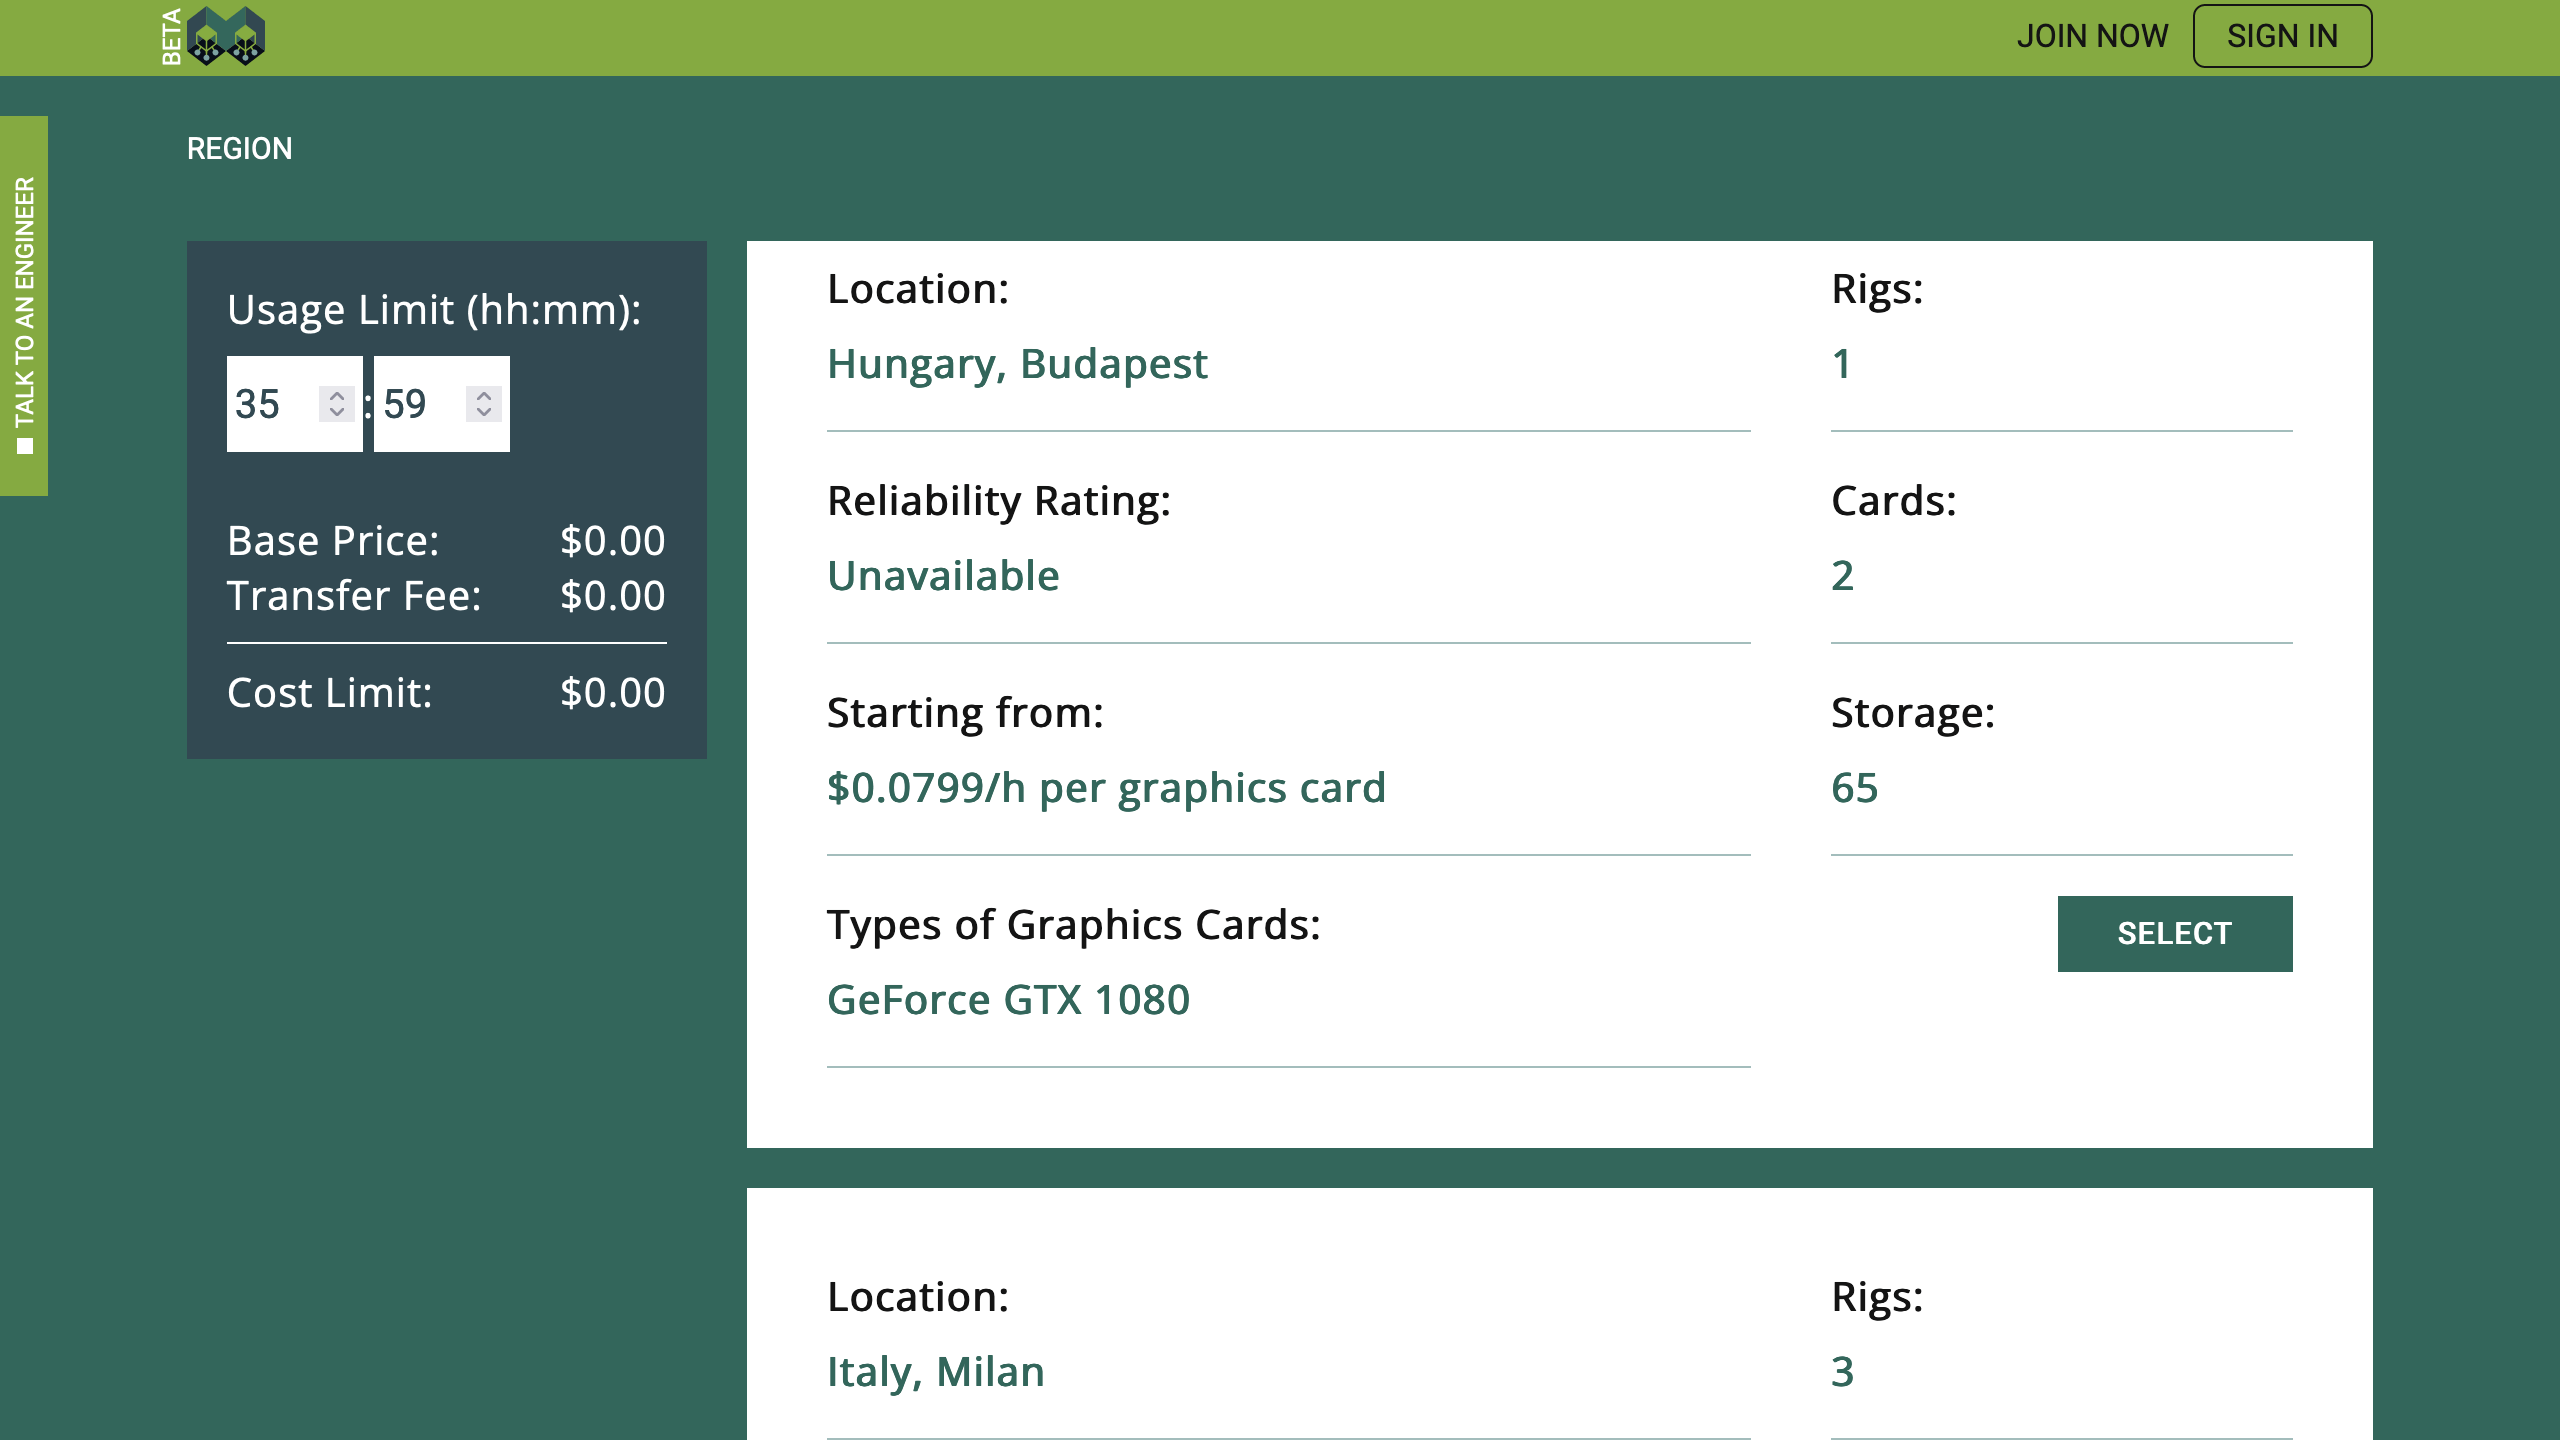
Our hardware requirements are modest. An instance with 2 CPU cores, 8 GB of RAM, and 40 GB of disk space is more than enough. We do not need graphics cards today.
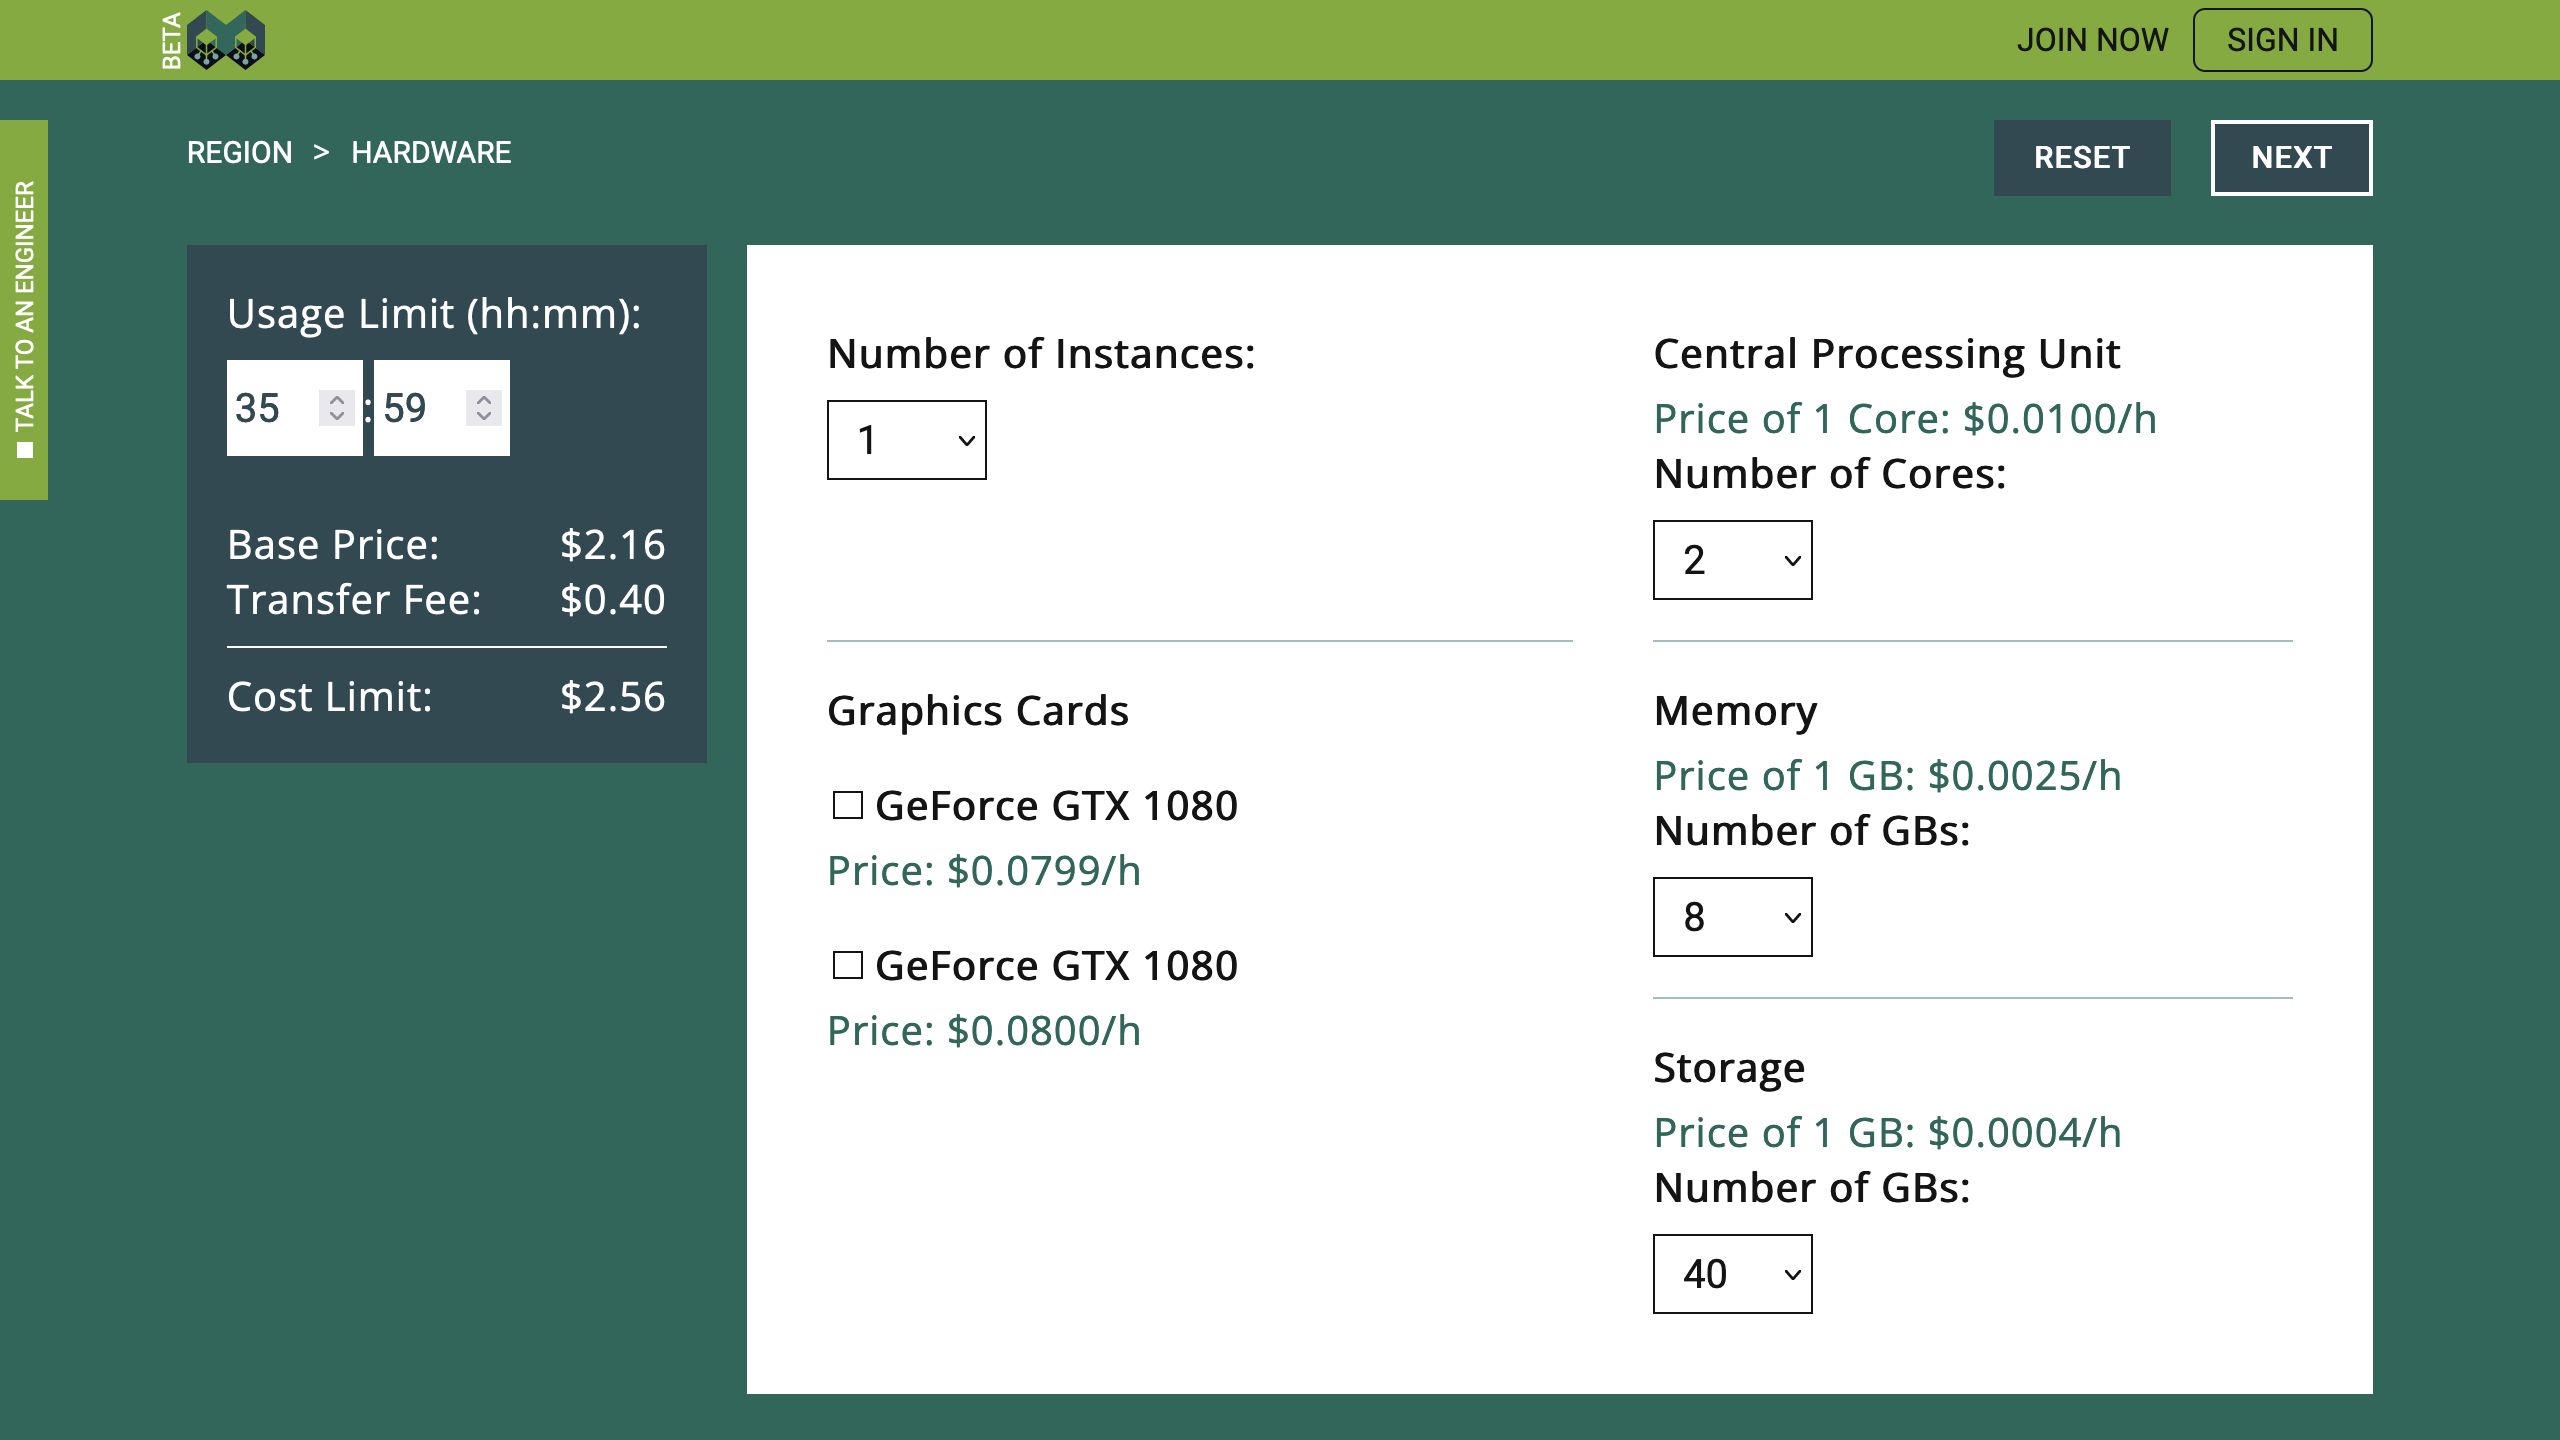
Clearly, you can use Linux OpenSSH Server with graphics cards, if you want to. For crypto-currency mining, machine learning, or other types of heavy processing, more powerful hardware is needed.
Environment Selection
Moving on, we will define the environment to be installed on the virtual machine. As already mentioned, we are installing "linuxserver/openssh-server", in this tutorial. Furthermore, we are going to use SSH to deploy cached files, and HTTPS to distribute them. Hence, we need to enable HTTPS-access and VPN-access. See the checkmarks under "Supported Access Protocols". Then, we need to map "Https Ingress Port" "22" to "2222", which is the default port used by linuxserver/openssh-server. And we need to map "443" to "8000", which is the port of the imaginary cache server.
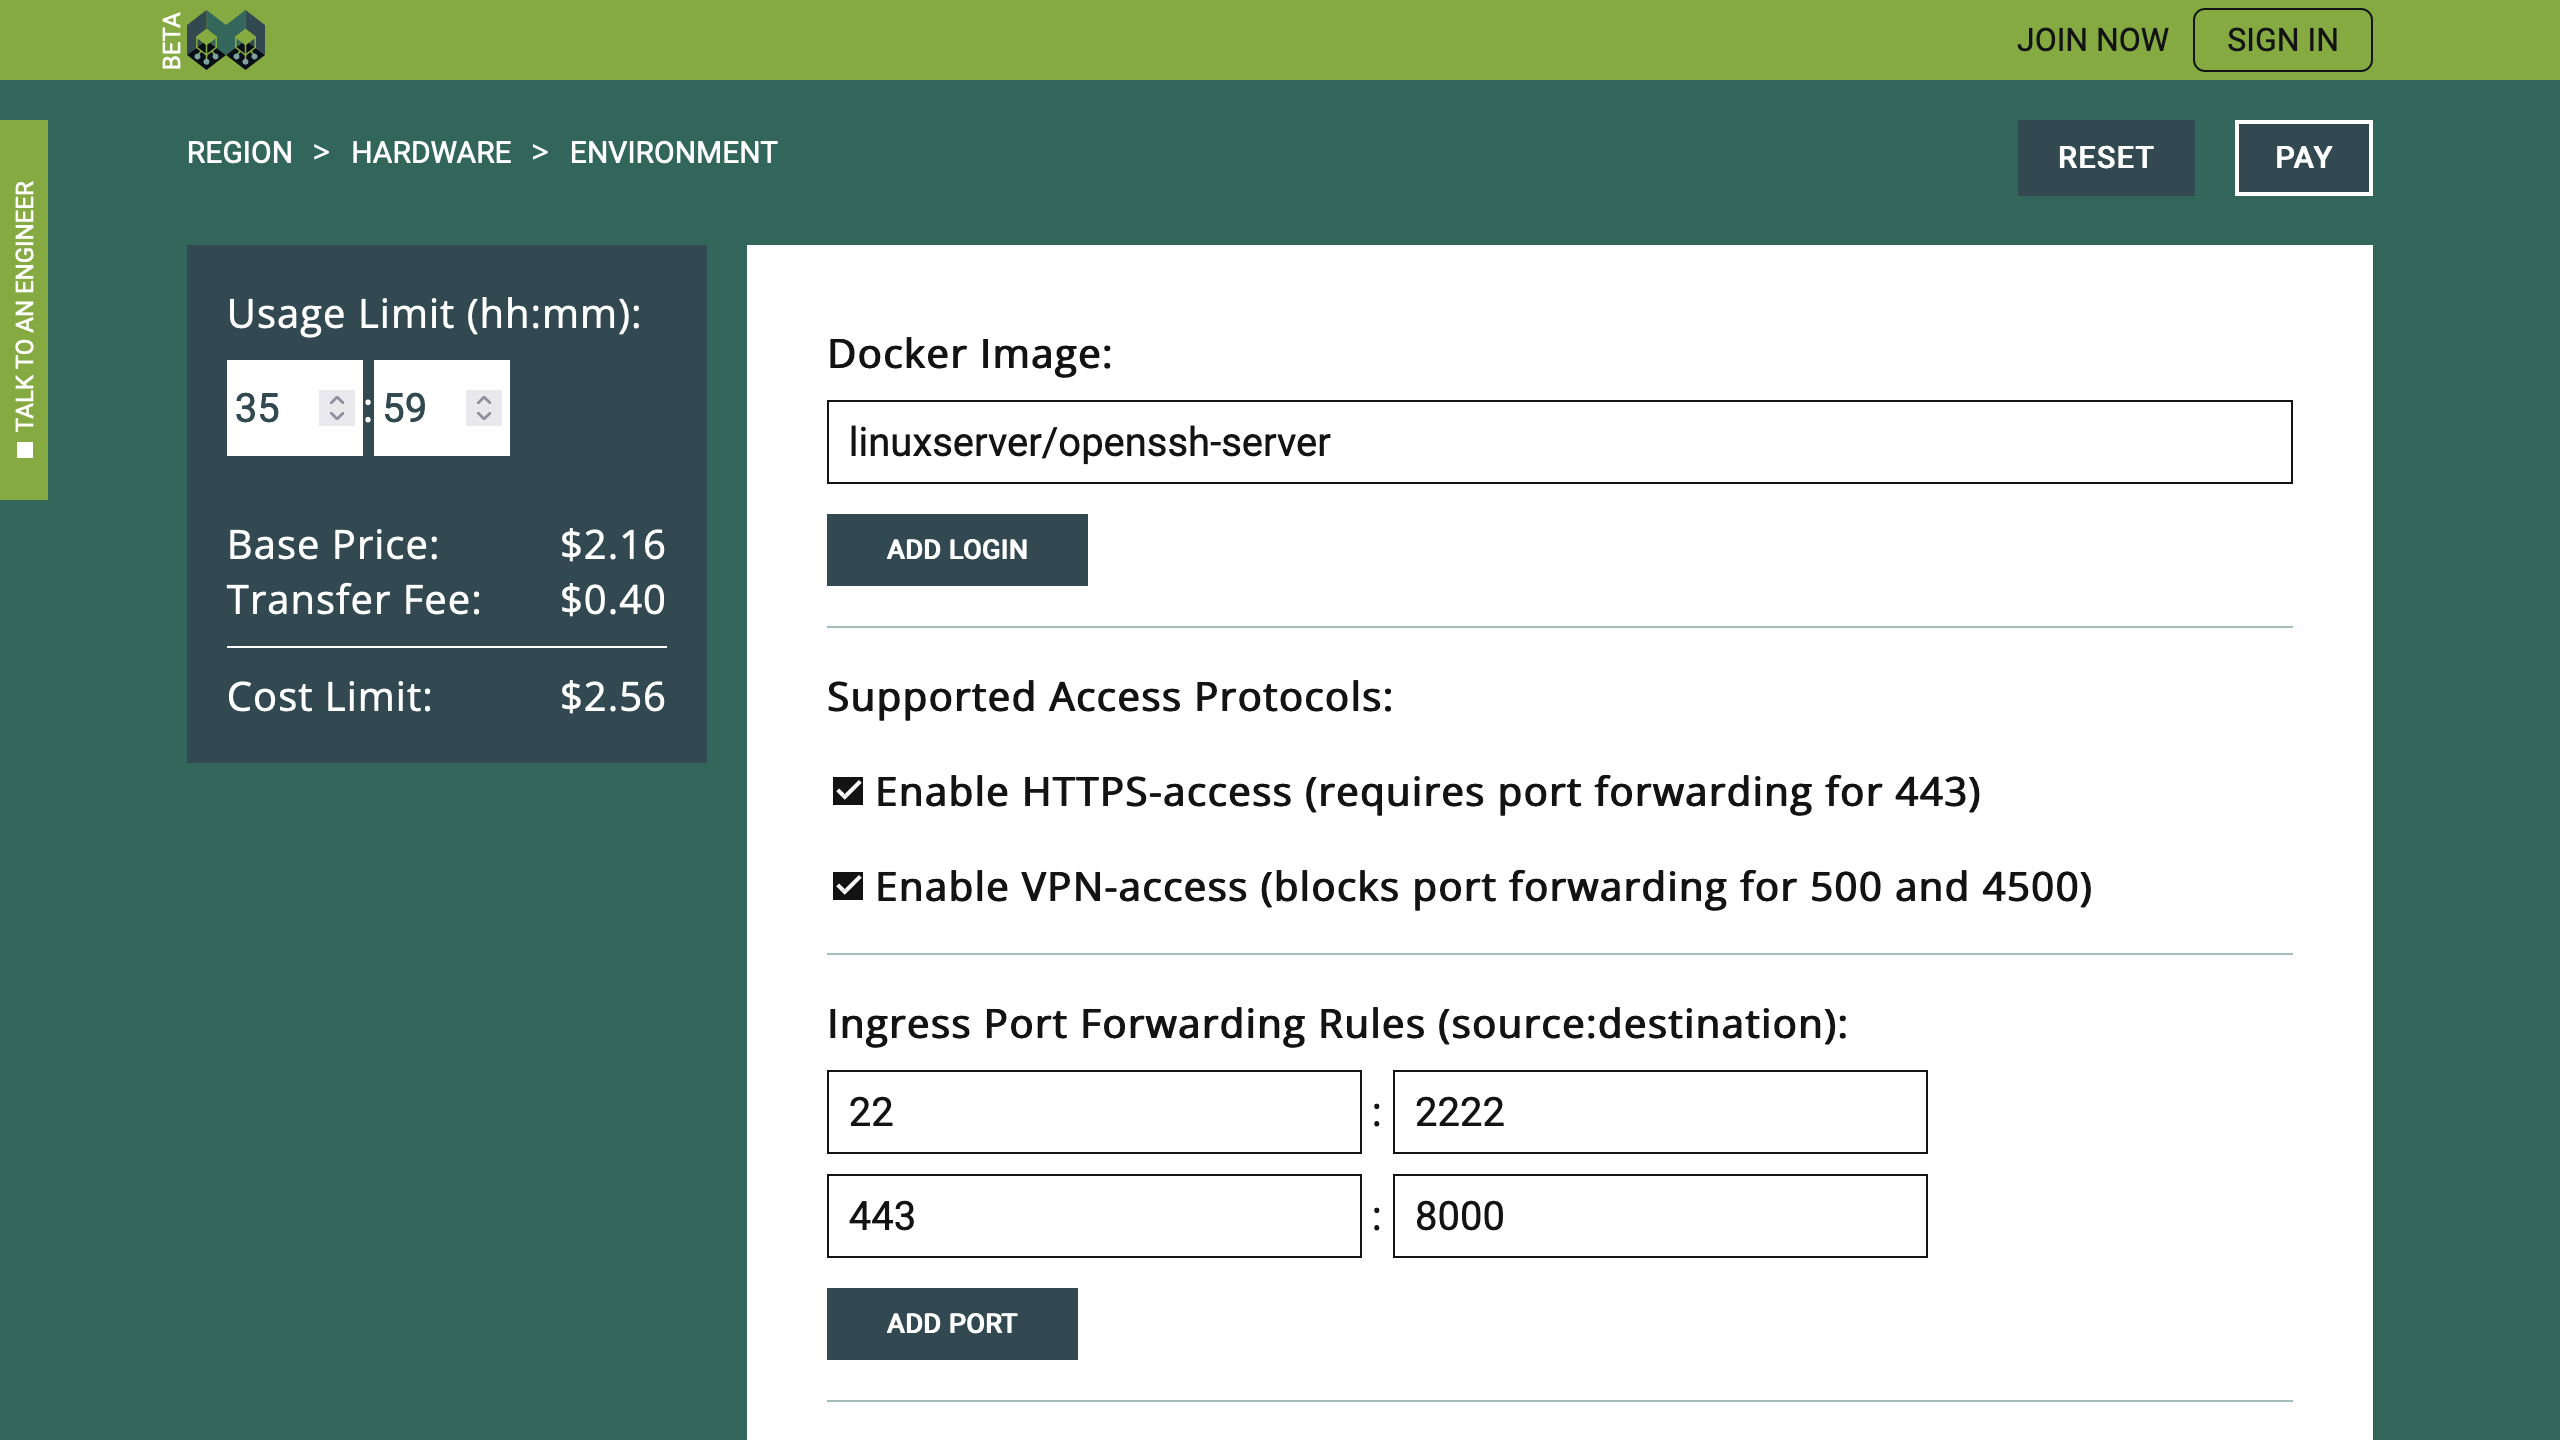
Server installation is out of the scope of this tutorial. If you need a different port, you can replace "8000" with another value.
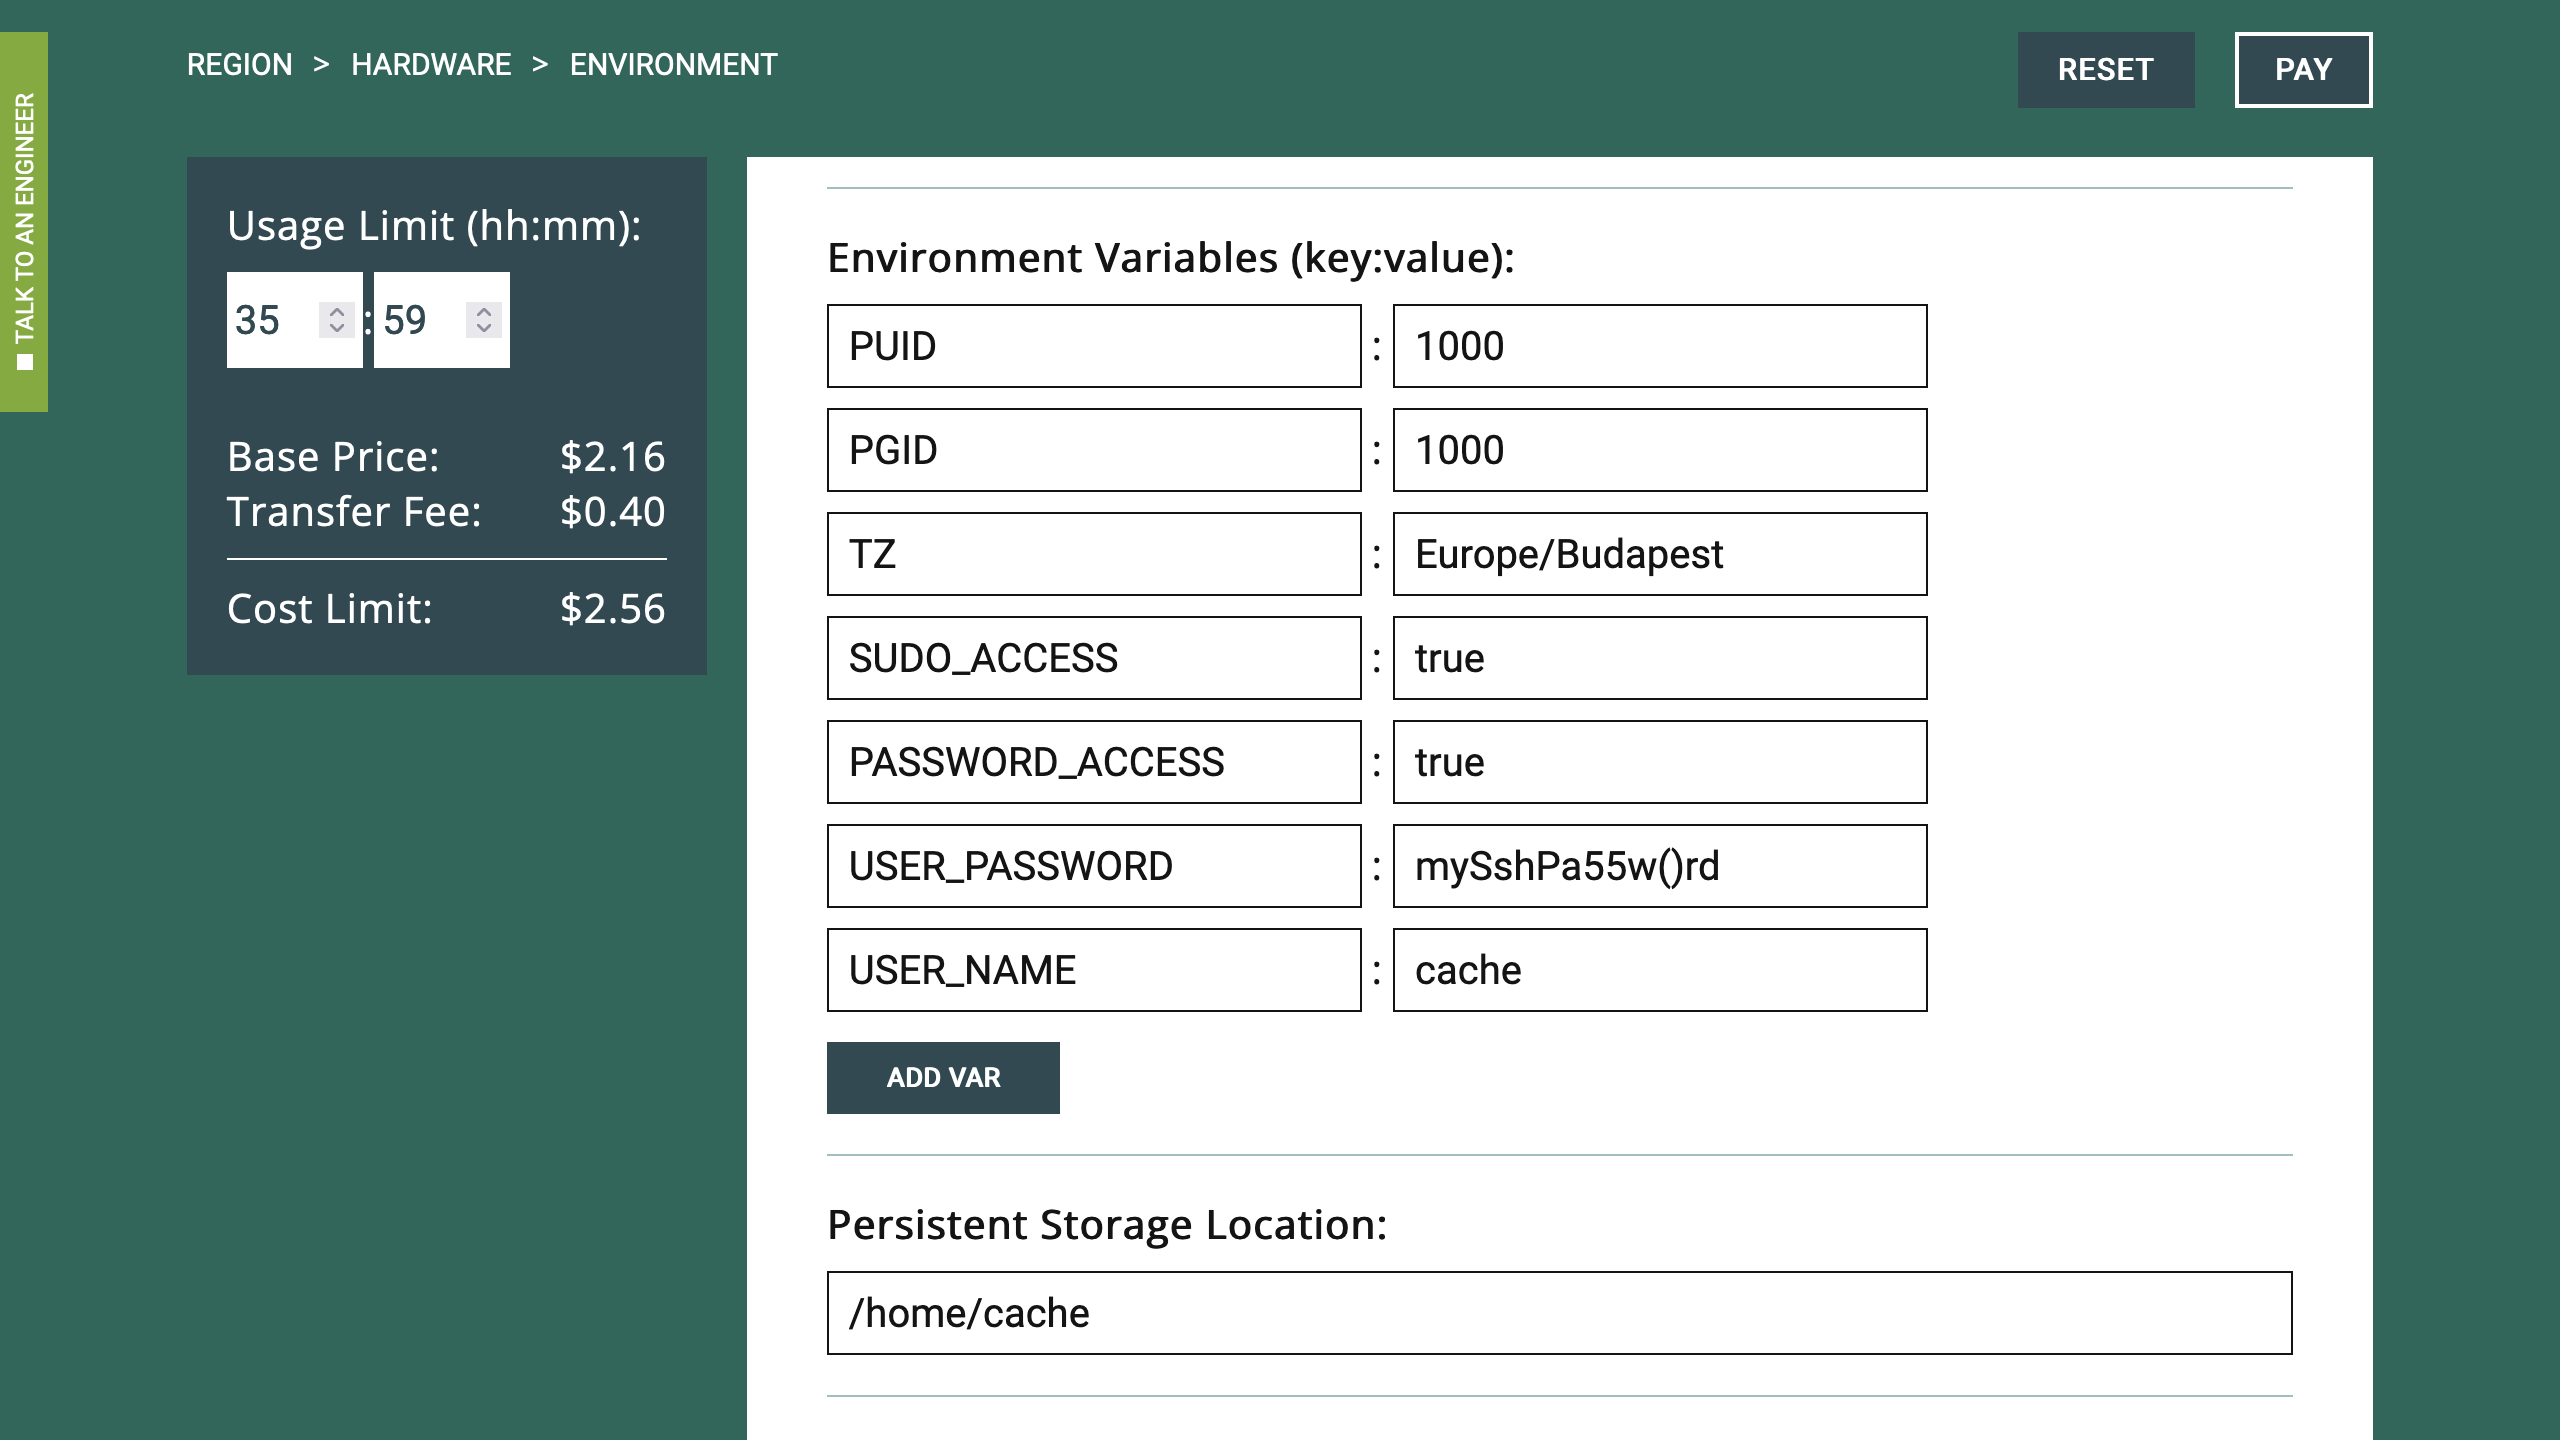
Let us set "Environment Variables" and "Persistent Storage Location" as well. Consider using different values for "USER_PASSWORD" and "USER_NAME", even though VPN-access is protected by your access token already.
Now we can hire our virtual machine.
Payment
On the left side, you can check again the selected environment and hardware. If something is wrong, you should navigate back and correct the mistakes. Otherwise, you may enter your email address and click "Confirm", to activate the Terms of Service agreement checkmark.

When you express your agreement with the Terms of Service, PayPal buttons will appear, and you can decide between the direct PayPal payment or Credit Card payment via PayPal. Both options ensure that Tensor Sharing will not see any of your payment credentials. The platform will only receive the information on the payment status, which, in case of success, will finish the virtual machine hiring process.
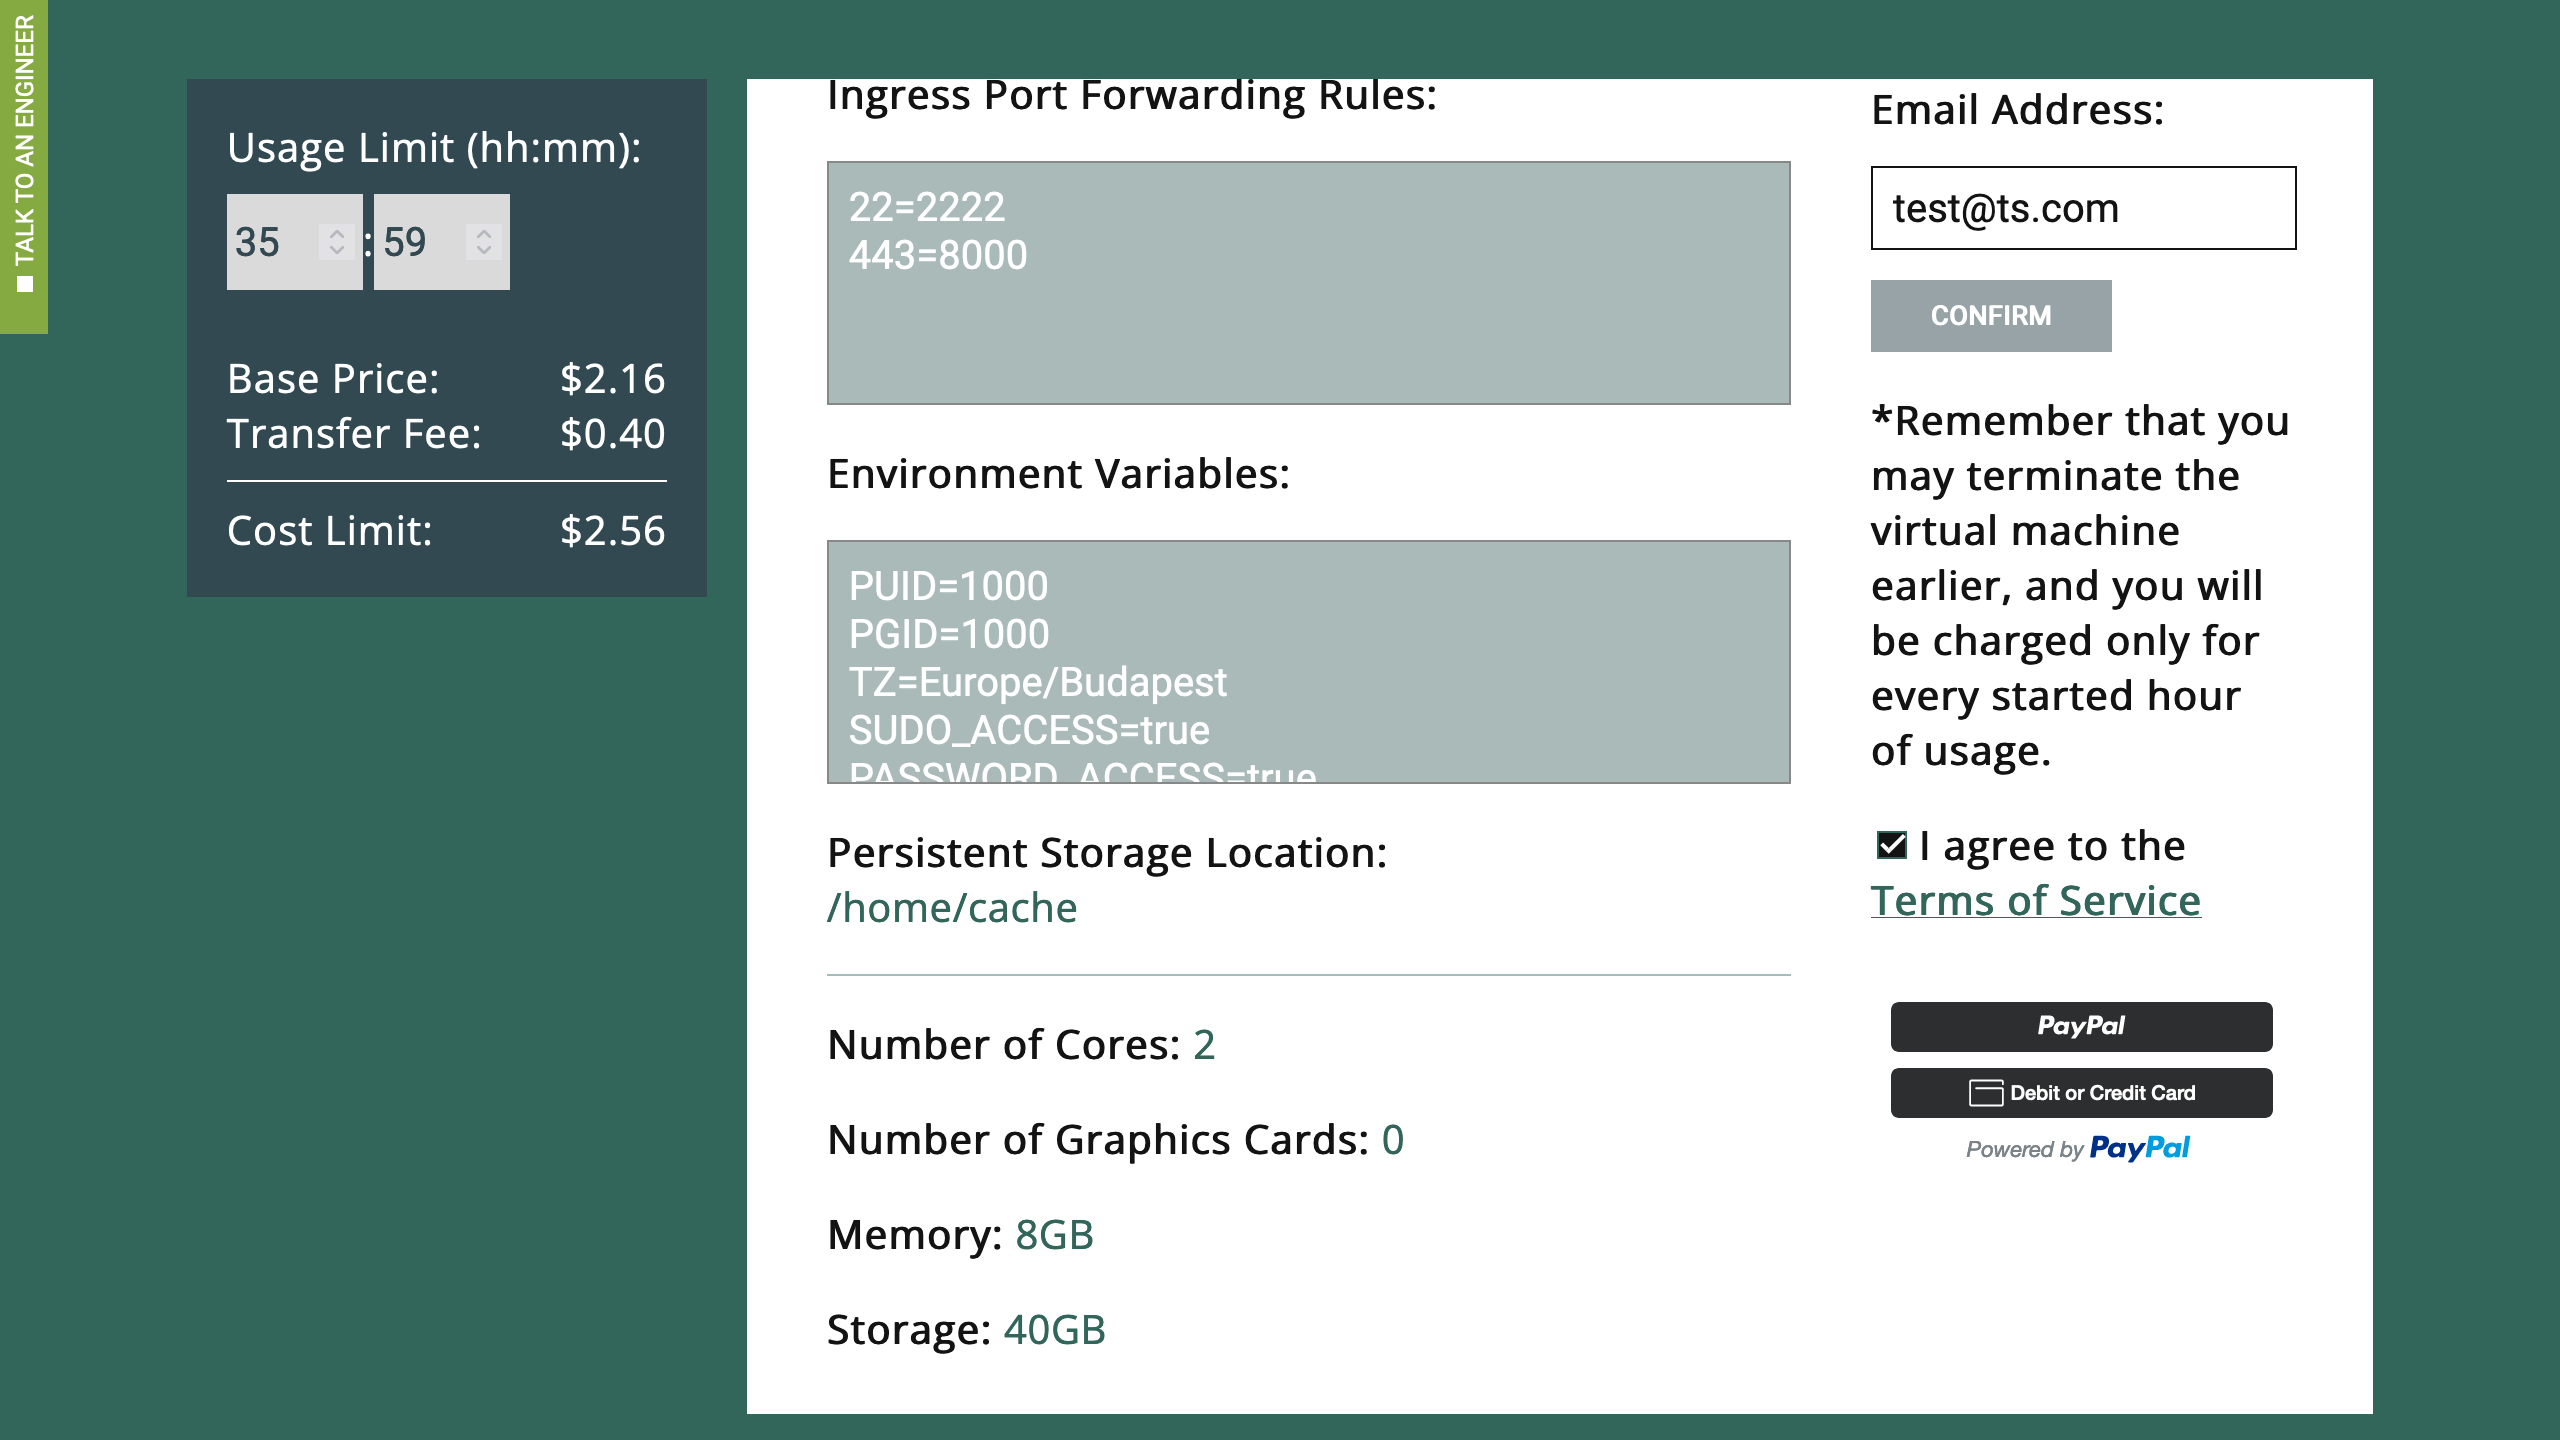
For example, if you click on the upper PayPal button, a pop-up window will appear, and you can use your PayPal account to execute the payment. The payment limit for the selected hardware and duration is $2.56, which means that $2.56 will be reserved, but you may be charged less if you terminate your session earlier.
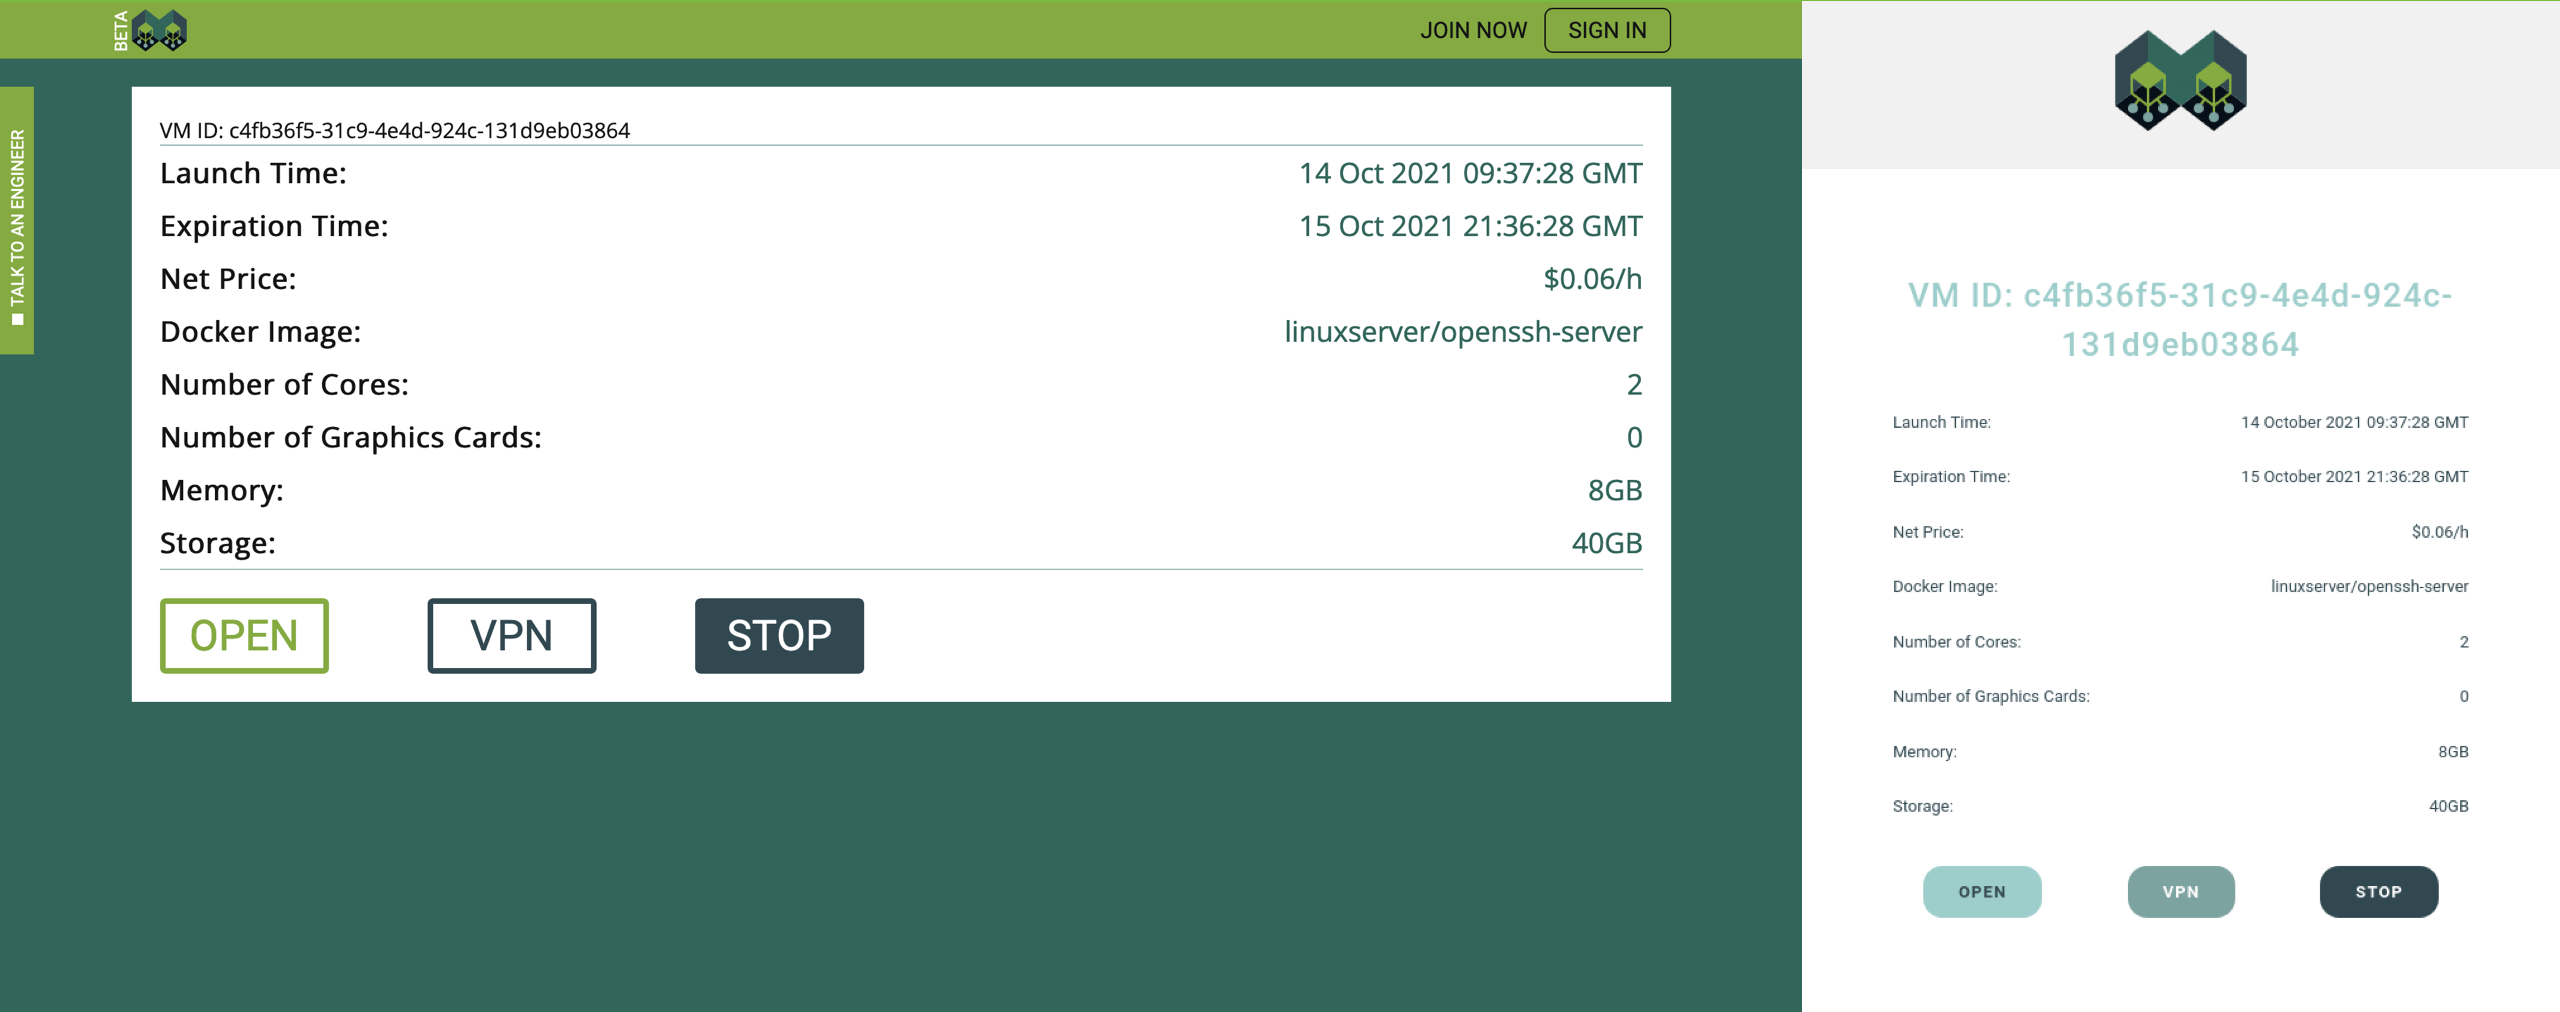
If the payment is successful, you will see a corresponding message with two options. To navigate back to the Tensor Sharing main page, you should select the "Home" button, and to see the control board of the hired virtual machine, you should select the "Log" button.
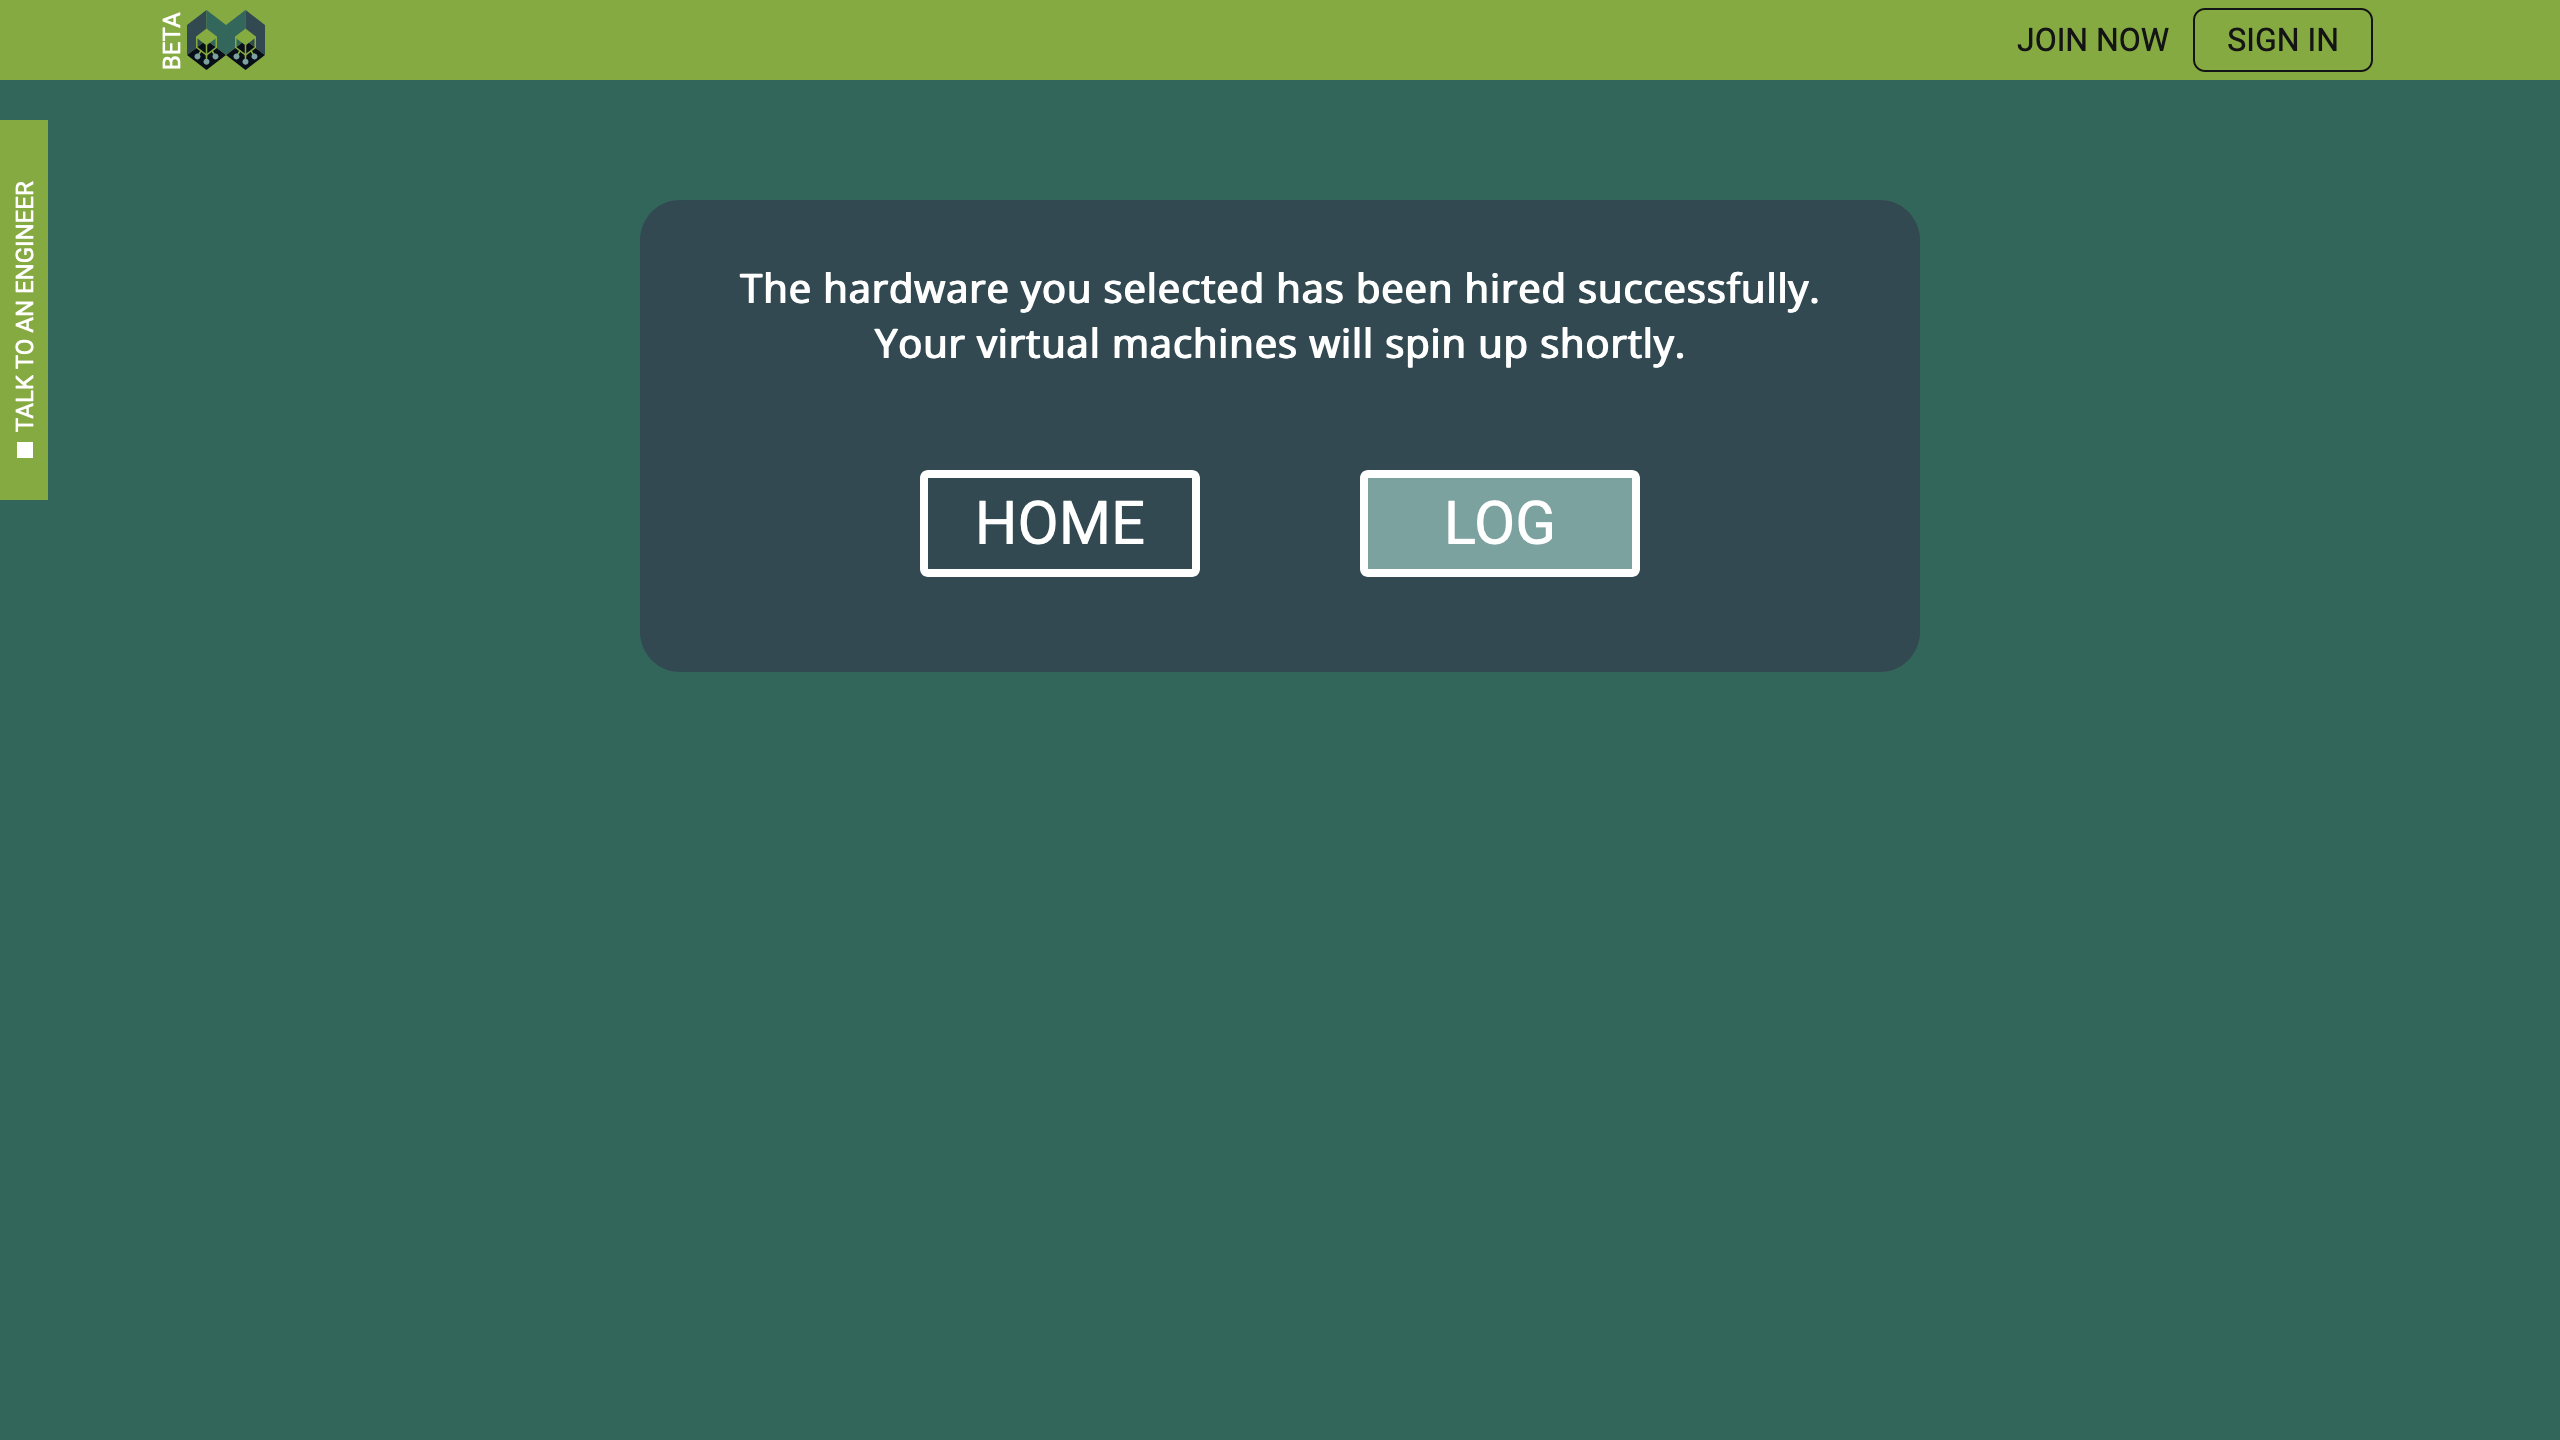
The equivalent to the Log content will be sent also to the email address you specified.
Take a note that if you deleted the email sent by "no-reply@tensorsharing.com", you closed the web-page or navigated away from the https://www.tensorsharing.com/hire, and you do not have the Tensor Sharing account, you can still recover your access to the virtual machine by creating a new Tensor Sharing account with the same email address that you used for the payment. If you already have the Tensor Sharing account, hired virtual machines will always be visible in your dashboard. However, if you cannot access the selected email address, and you cannot sign in to your Tensor Sharing account, you will not be able to control or access the virtual machine you just hired when https://www.tensorsharing.com/hire is closed.
SSH from Local Machine to Virtual
It will take two or three minutes, on average, before the virtual machine spins up. In the meantime, we can set up the VPN connection, which we need to access the virtual machine using any other protocol than HTTPS. Click on the "VPN" button and then "REGISTER IP".
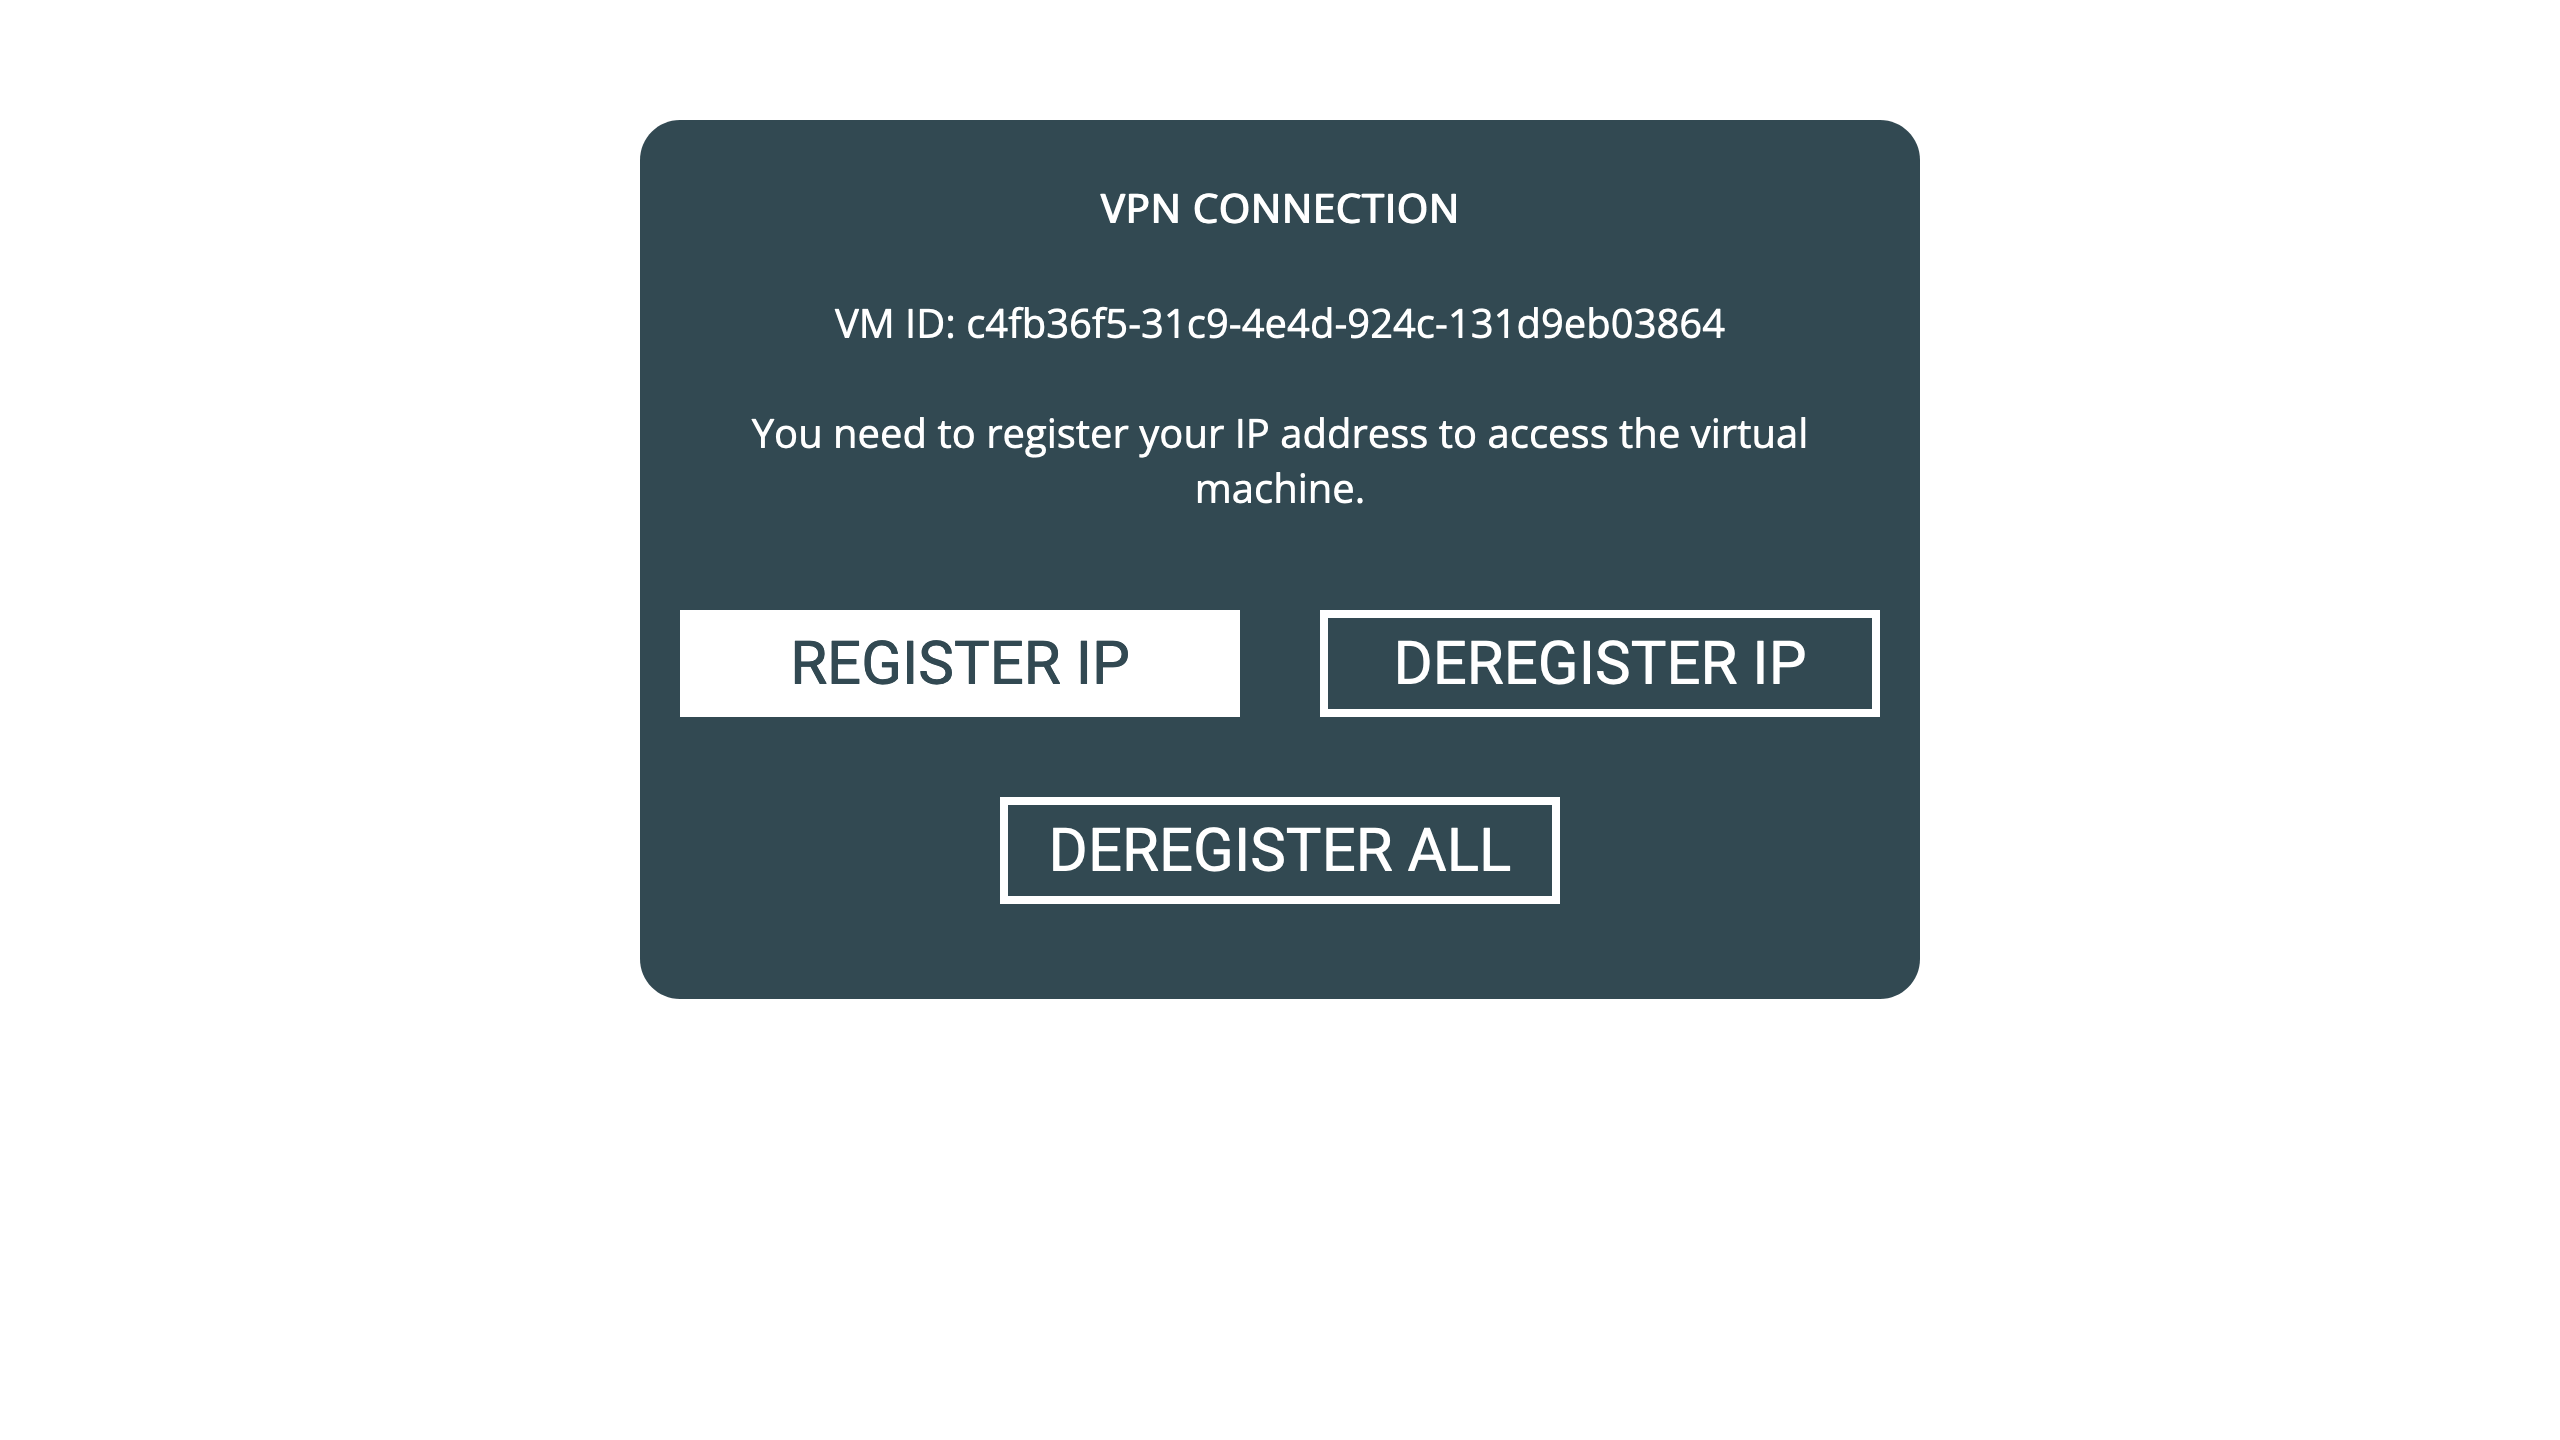
Now VPN connections can be established from your IP address, but they cannot be established from other locations. Copy and paste VPN-access credentials into your VPN client, and establish the connection. For different VPN clients, you can follow existing tutorials, such as, Connect to a VPN in Windows, Connect your Mac to a VPN, and How to setup IKEv2 VPN on Linux.
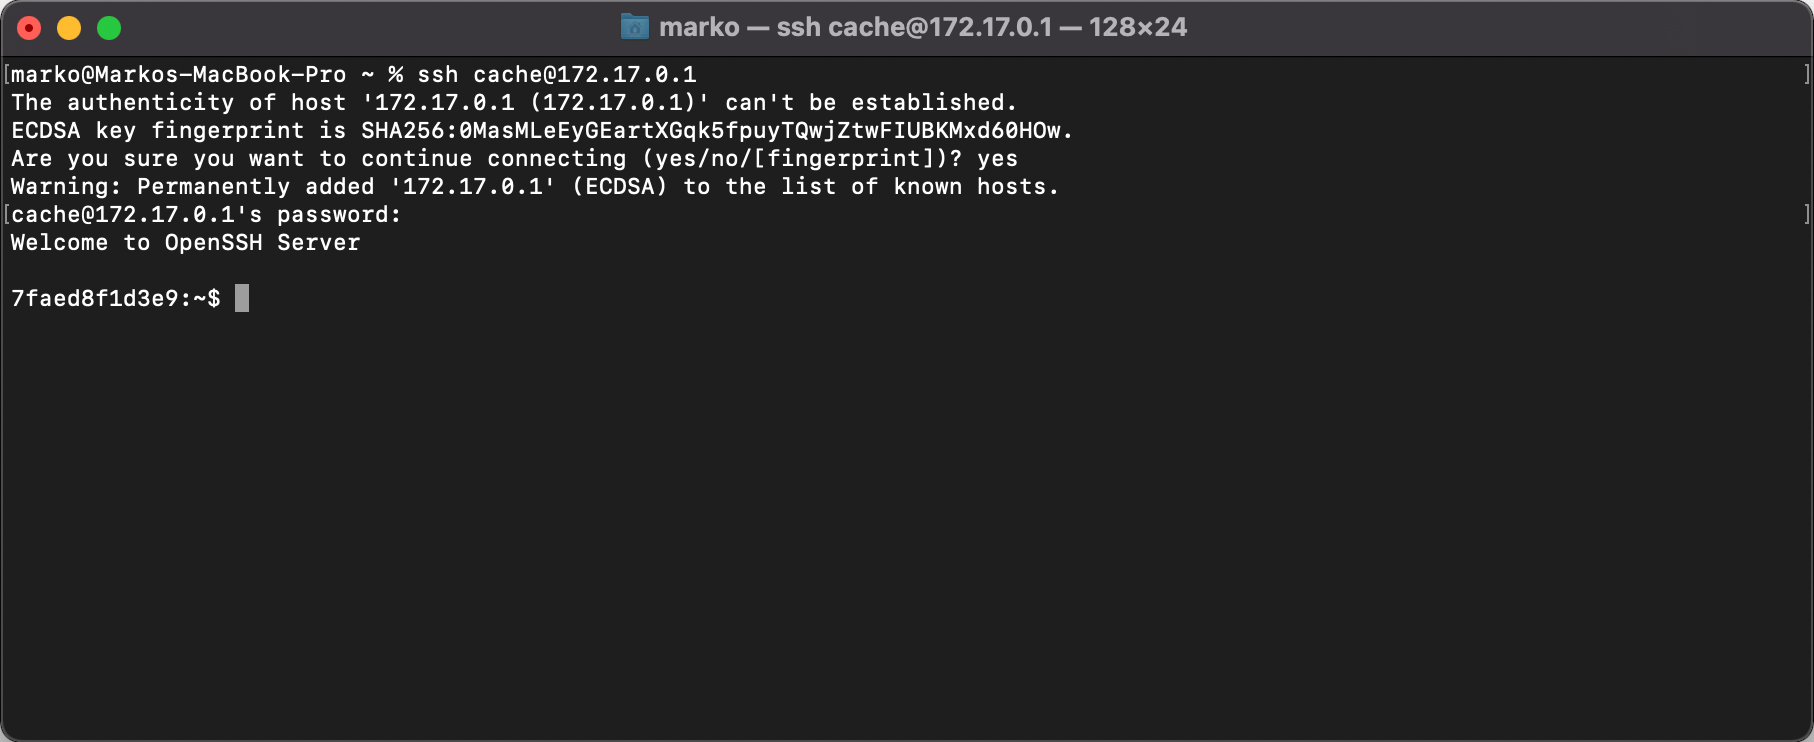
To connect via SSH, use Terminal or Putty. The local address of your machine is "172.17.0.1", and can be used over the VPN. In a terminal window, "ssh cache@172.17.0.1" can be used, and then the previously defined password.
Have fun interacting with your virtual machine and take care.